Every driver knows that a wheel change is on the agenda for spring and autumn. In the following text you will find important information and tips for the upcoming wheel change. 1. Check used tires for defects, 2. A stable hydraulic jack is particularly suitable for changing 3. Be sure to check the air pressure after the change!
The preparation: what do you need?
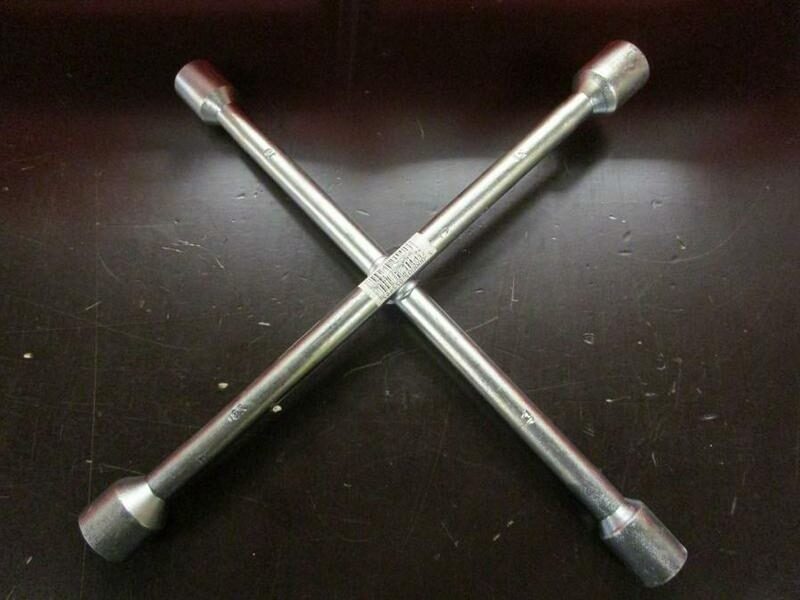
If you want to change the wheel yourself, you should first have the necessary tools ready. Important are a Sturdy jack, jack stands, wheel cross, wire brush, storage box for screws and a torque wrench. If your vehicle has a Felgenschloss available, you need the appropriate key. Do you want to change from steel to alloy wheels They often use different wheel bolts or nuts. This also applies to rim locks. Are all the necessary parts ready? Then you are ready to change wheels.
Review: Wheel Bolts & Tires
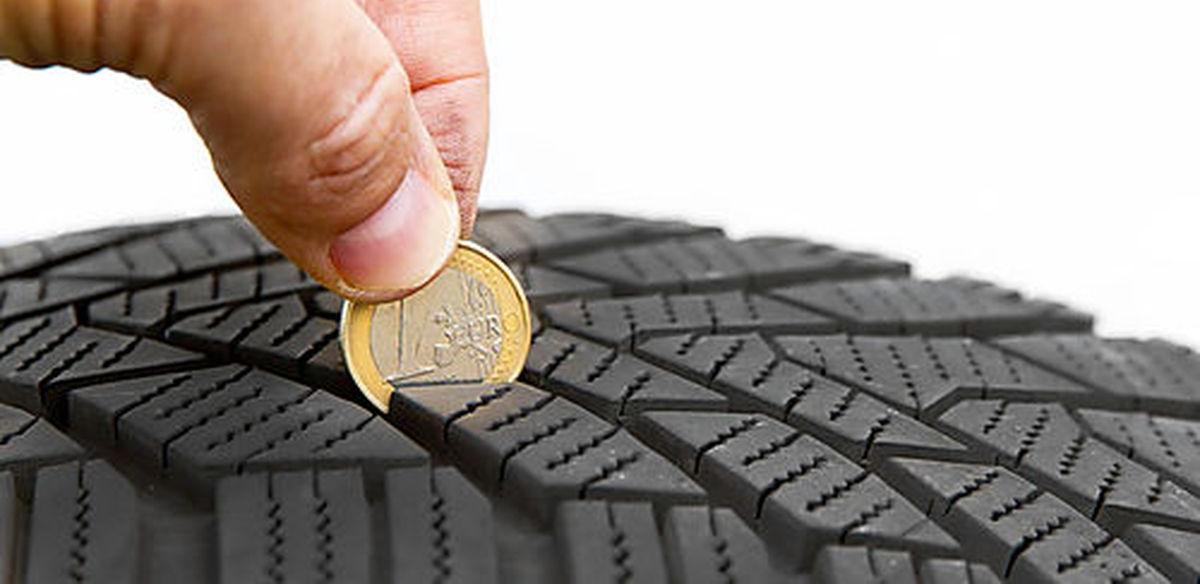
The wheel bolts or nuts used must be opened before use Damage be checked. Thread, bearing surfaces and screw connections must clean and free from rust be. One is suitable for removing dirt and light rust wire brush. Under no circumstances should the threads be lubricated. Special care should be taken with tires that have already been used. These should be checked carefully for damage. The prescribed minimum tread depth of 1,6 mm should also be observed. However, we recommend at least 4 mm for winter wheels and 3 mm for summer wheels.
The wheel change step by step
- The vehicle through Apply the handbrake and engaging first gear to prevent it from rolling away. In automatic vehicles, move the selector lever to the "P" position.
- Pull off existing hubcaps. First loosen the wheel bolts or nuts by about a quarter of a turn.
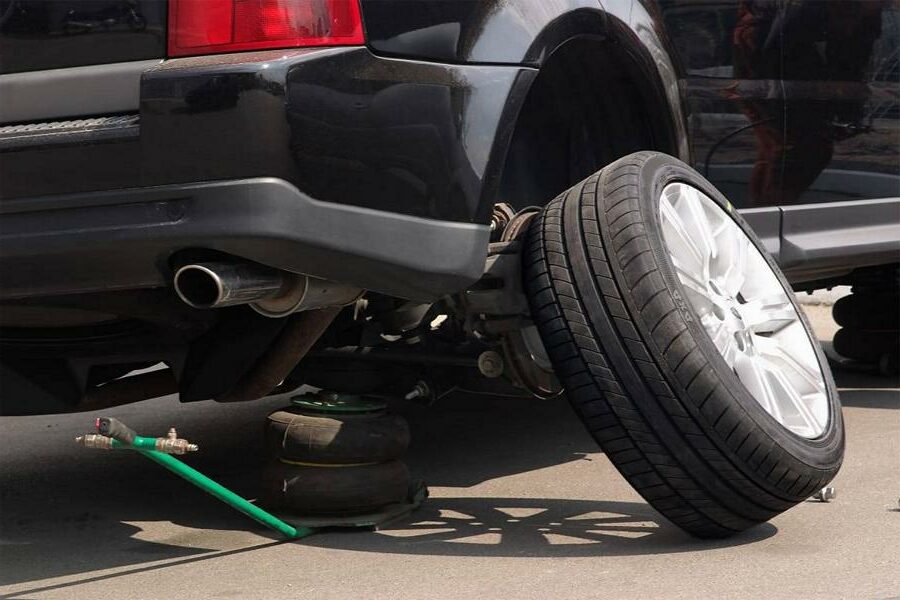
- The jack must be placed in the correct place on the underbody. Be sure to note the Safety instructions in the operating instructions of the vehicle.
- The vehicle is brought to the assembly height.
- The wheel bolts can be unscrewed completely.
- Take the wheel off and place it under the vehicle. Attention: Alloy wheels often sit very tightly on the steel hubs.
- If the wheels are already in use, it is advisable to attach the wheels on the front axle to the rear axle. The wheels of the rear axle are mounted in front to achieve an even tread wear.
- Attention: tire can directional be. The direction of rotation is indicated by an arrow on the tire sidewall. These wheels may only be mounted in the direction shown, so a diagonal exchange is not possible.
- The wheel contact surfaces must be cleaned before the new wheel is fitted. It is also essential to check the brake discs and pads.
- Put on the new wheel and the wheel bolts with the wheel cross screw hand-tight.
- Remove the removed wheel from under the vehicle.
- Lower the vehicle until the tire is just on the ground.
- The wheel bolts are tightened crosswise. Definitely on that prescribed torque respect, think highly of. Attention: Emergency wheels usually have special tightening torques.
- The dismantled wheels mark on the tread, eg with wax crayon ("VL" for "front left", "HR" for "rear right" etc.).
- Put the used tools and the old wheels away.
- The Store wheels correctly.
Follow-up: checking the air pressure!

Immediately after changing the wheels, one should immediately Check and possibly adjust the tire air pressure be made. In addition, the wheel bolts must be checked again after approx. 50 km and tightened again if necessary. In order to achieve an even wear of all four wheels after 8.000 to 10.000 km the wheels are exchanged axle by axle, i.e. the front right wheel to the rear right and the front left wheel to the rear left. If the tires have different tread depths, the Tires with the greater tread depth are always on the rear axle set. However, changing tires by axle is only possible on vehicles that are not equipped with a mixed tires (different tire sizes), e.g. when using a sports chassis. In that case, please Strictly observe the vehicle's operating manual.
Have the wheels changed in the workshop
If you do not have the necessary experience to change wheels, this should always be carried out by a specialist workshop. Going to a specialist workshop is particularly useful for large, heavy SUV wheels. Also in vehicles with a tire pressure monitoring system (RDKS) equipped, wheel changing may be more complicated. Since 2014, all new cars must be equipped with such systems. They sound an alarm if the tire pressure or size changes. There are two types of these systems. the indirectly measuring systems measure the rolling movements of the wheels. After a wheel change, the system only has to be activated at the push of a button on the first trip be recalibrated, at directly measuring systems Sensors in the tires measure the pressure and send the results to a control unit in the vehicle. Each sensor must be reconnected to the control unit using a special device. In this case, the wheels must be changed in a tire workshop or specialist workshop.
The following note is essential: For safety reasons, tuningblog recommends all repair, inspection and maintenance work exclusively to be carried out in a specialist workshop! Although our information is summarized to the best of our knowledge and belief, we cannot assume any liability for the content. All information is therefore "without guarantee".
Of course, that wasn't the end of it!
In this tuningblog category there are guides and instructions for common defects/repairs on the vehicle and for installing accessories/tuning parts. Our articles explain in a simple way common defects and the corresponding repairs and they also explain how the first signs of a defect become noticeable. In most cases, we also have initial clues to the repair instructions in our repair instructions approximate costs listed. The goal of ourAuto Repair Guide“ is to create a head start in knowledge for the next visit to the workshop with initial tips. This may save you from tedious troubleshooting and you may even be able to do small things yourself. The same applies, of course, to the installation of accessories/tuning parts. Here, too, we would like to help with the implementation with instructions and tips. There are many other posts on this as well. Below is an excerpt of the last and HERE there are all previous instructions.


