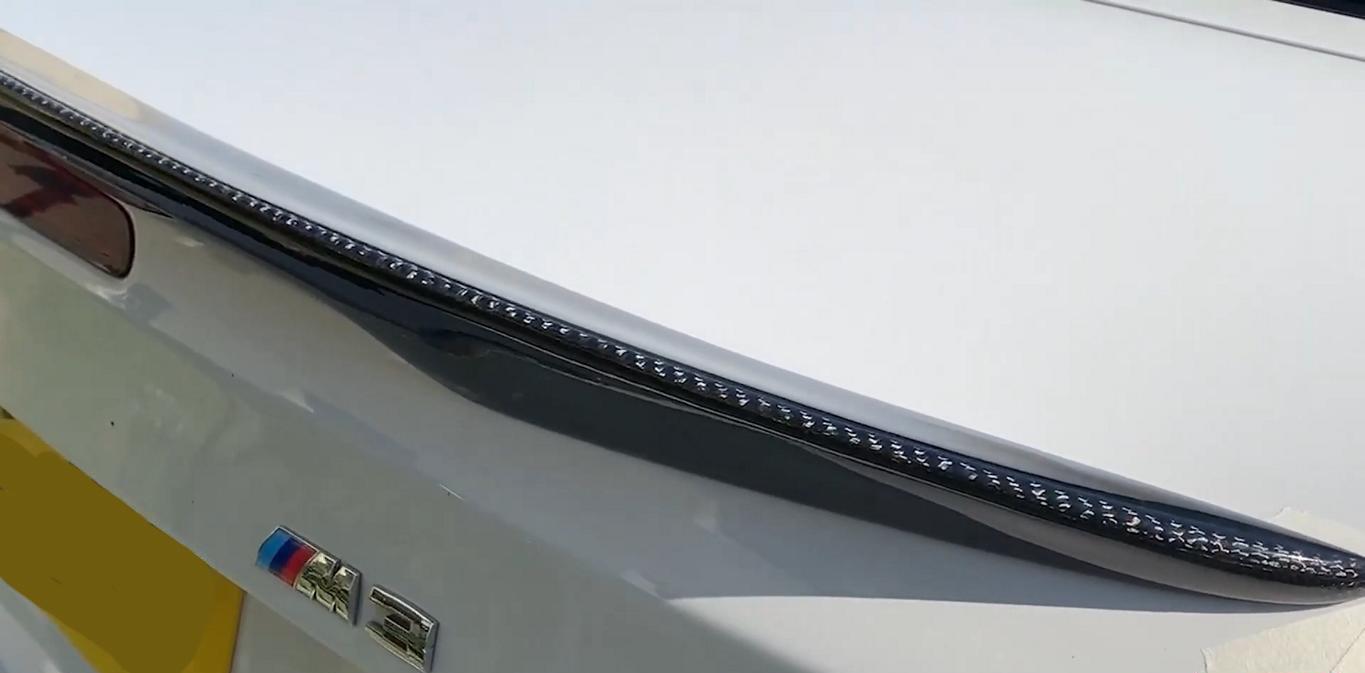
With our contribution "Install slim spoiler lip / rear spoiler“ we showed you how to easily install the popular tear-off edge at the rear of the vehicle. With the following article we would like to show you how such a spoiler lip, such as the standard rear spoiler from the BMW M package, remove can. And in principle, our instructions can also be used for other components glued to the vehicle such as canards on the front apron, Scheinwerferblenden, Fake-Fender gills , or roof spoiler be used. Because almost always only a simple but strong is used for fastening such components Tape (e.g. from 3M or Tesa). However, if the components are additionally screwed, then of course you have to consider that there may be holes in the body afterwards. It should also be borne in mind that instead of using adhesive tape, the components are covered with a body glue can be attached. In principle, dismantling is also possible here, but the effort can increase significantly.
Remove spoiler lip, canards & co

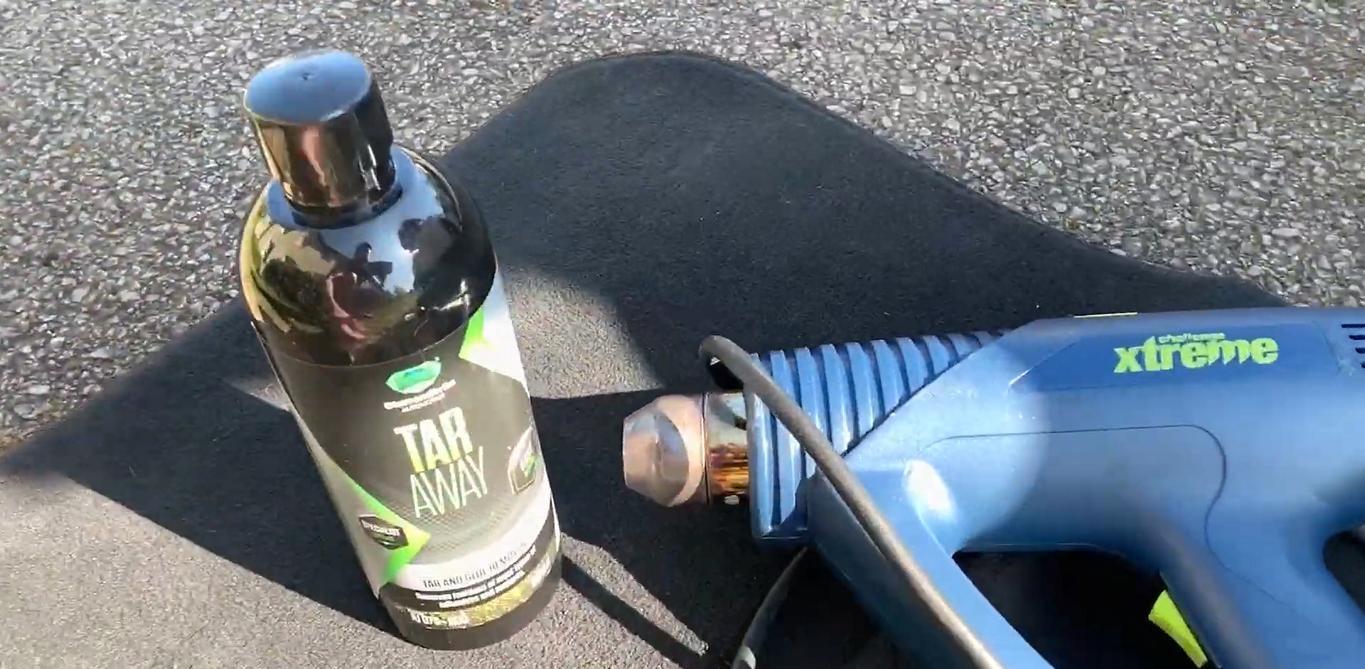
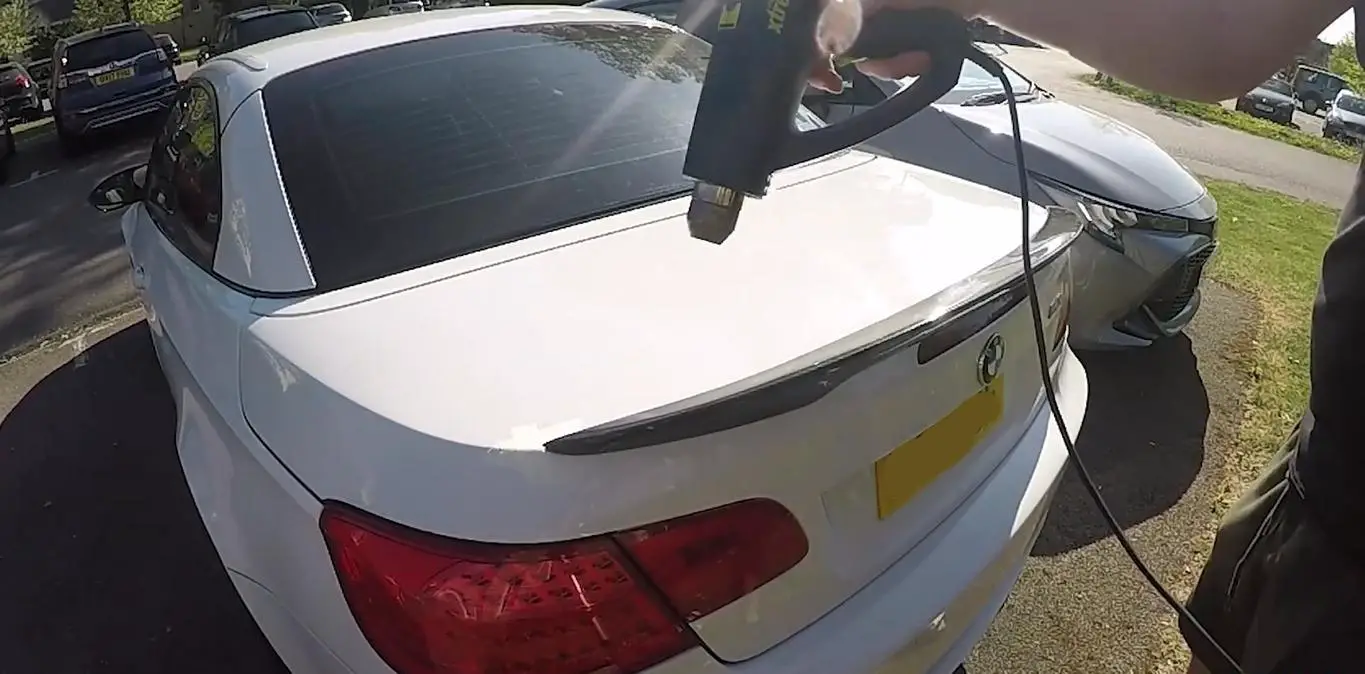
In any case, the removal should only be carried out in summer temperatures (if possible around 20 degrees). Both the bodywork adhesive and the adhesive tape are then significantly more flexible and removal is easier to implement. If the solar radiation is not sufficient (e.g. in winter), then a heat gun, a simple one hairdryer or Rotlichtlampe be used as an aid. When using a hot air dryer, please check the temperature (maximum 80 to 100 degrees and enough distance) regard. In addition, everything related to the component should be masking tape (masking tape) must be masked to prevent damage to the vehicle/paintwork.

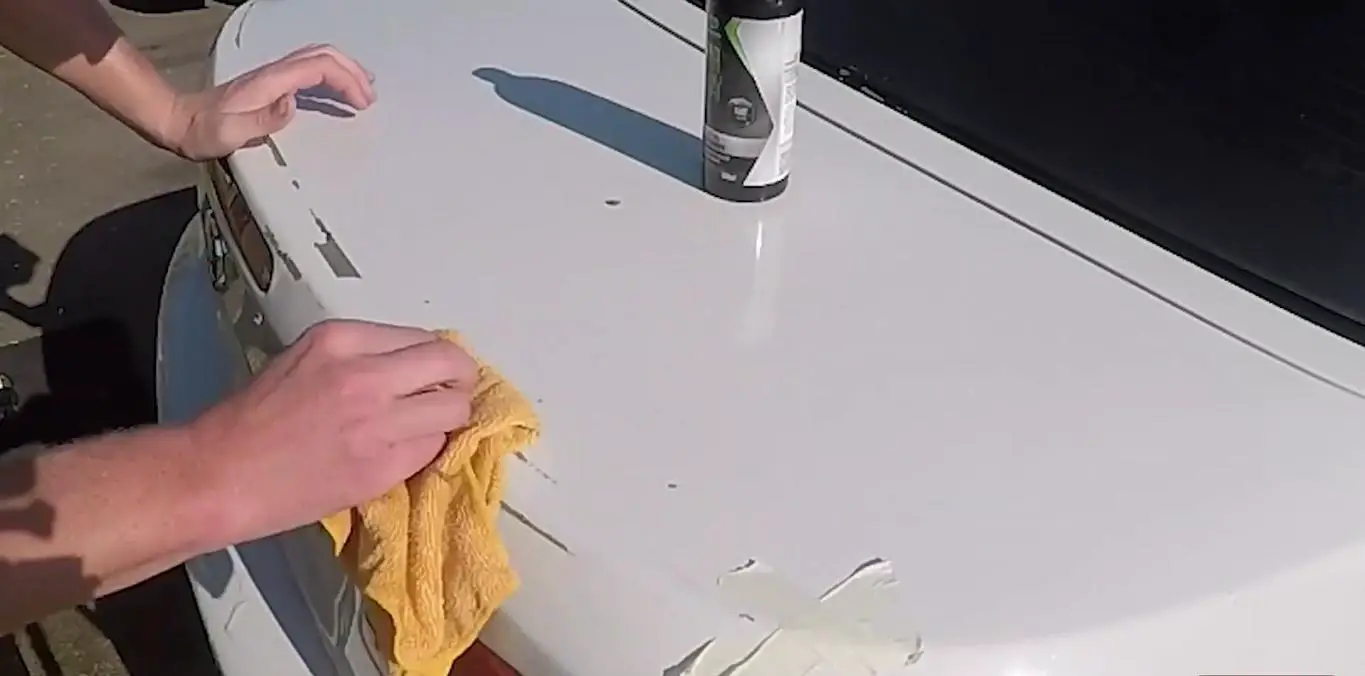
The procedure is as follows:
- the component to be removed and surrounding body parts clean/dry
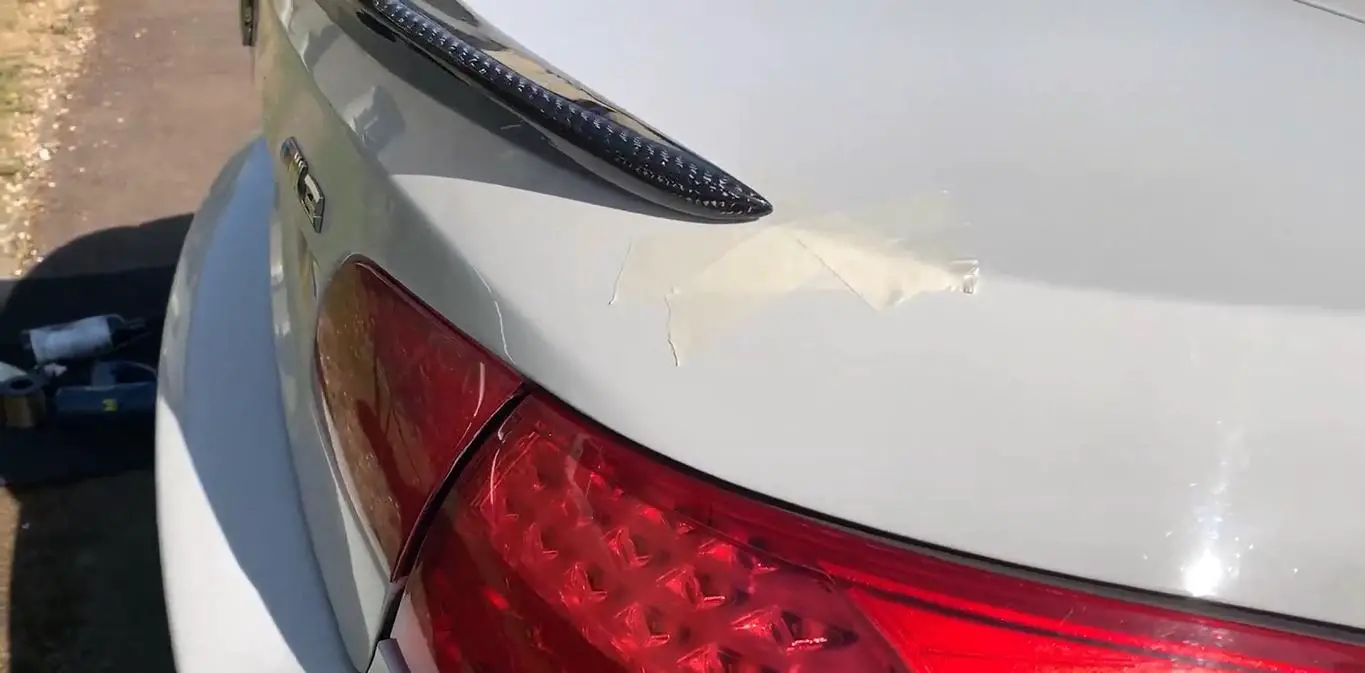
- the paint around the component to be removed masking tape mask off
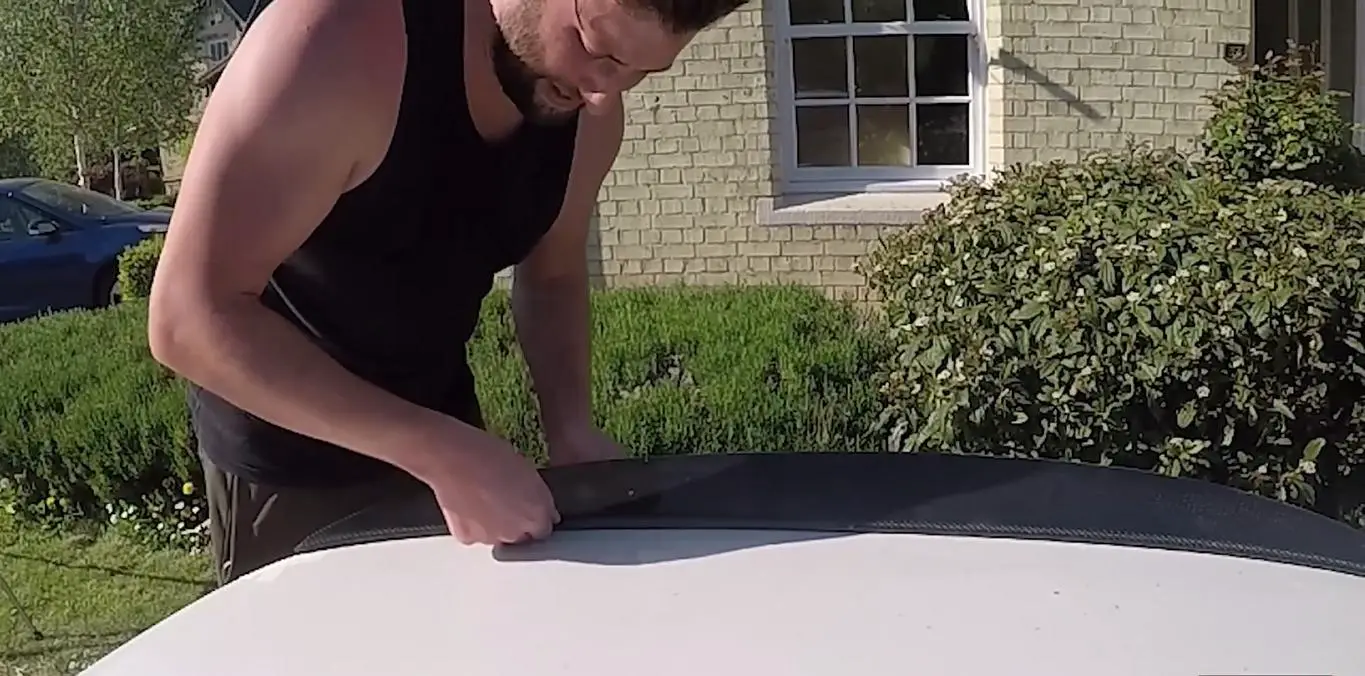
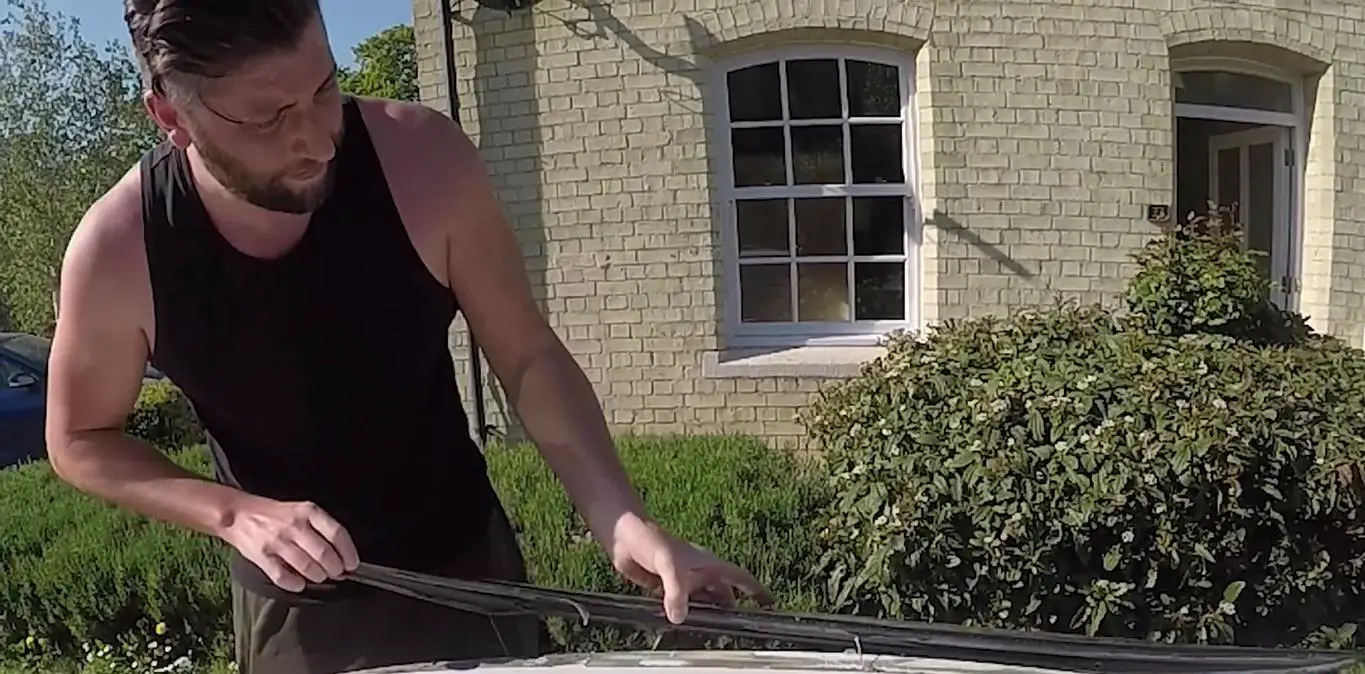
- the first 10 to 20 cm CAREFULLY heat (hair dryer, red light lamp etc.)
- now with one plastic spatula (or something similar) between the component and the body
- slowly slide the spatula through the glue/tape the Schieber
– as precisely as possible between the adhesive/adhesive tape and the component (then you don't touch the paint)
– as an alternative to the spatula, you can also Dental floss/fishing line be used (to and fro)
- also one plastic card with rounded edges may be suitable
- also plumb wire (not solder wire) is conceivable - gradually heat the component in order to loosen it completely using the tools mentioned above
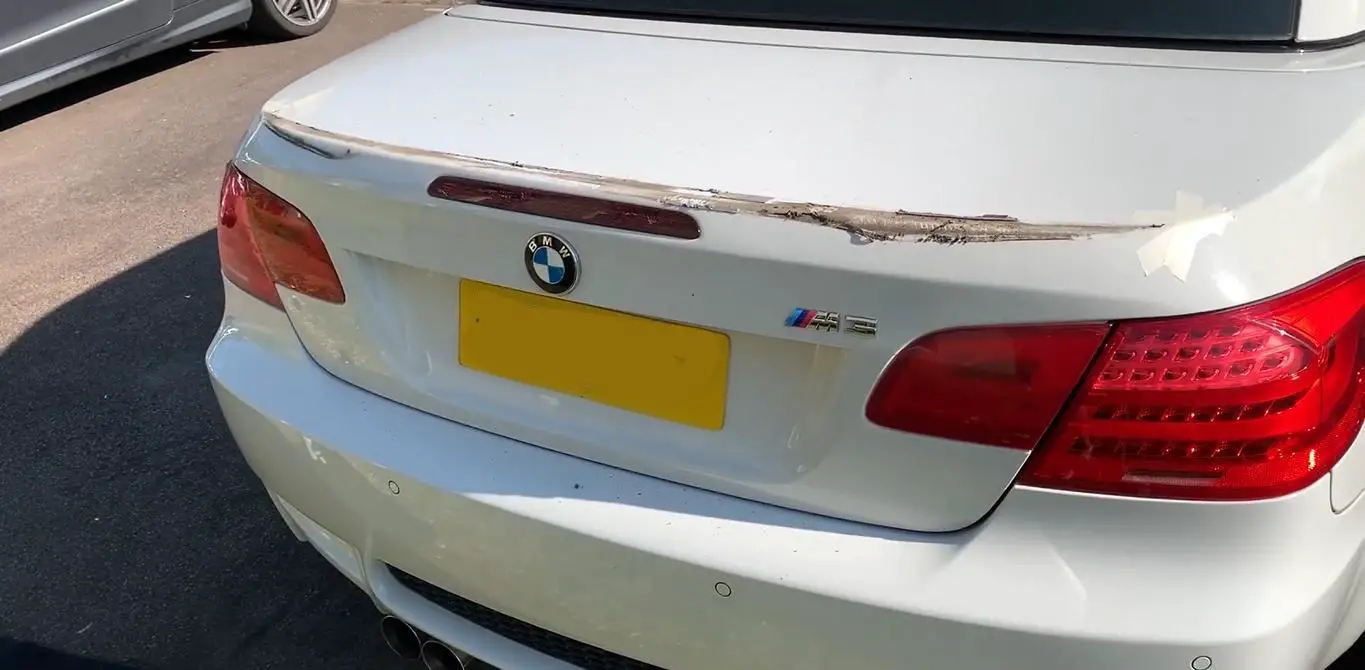
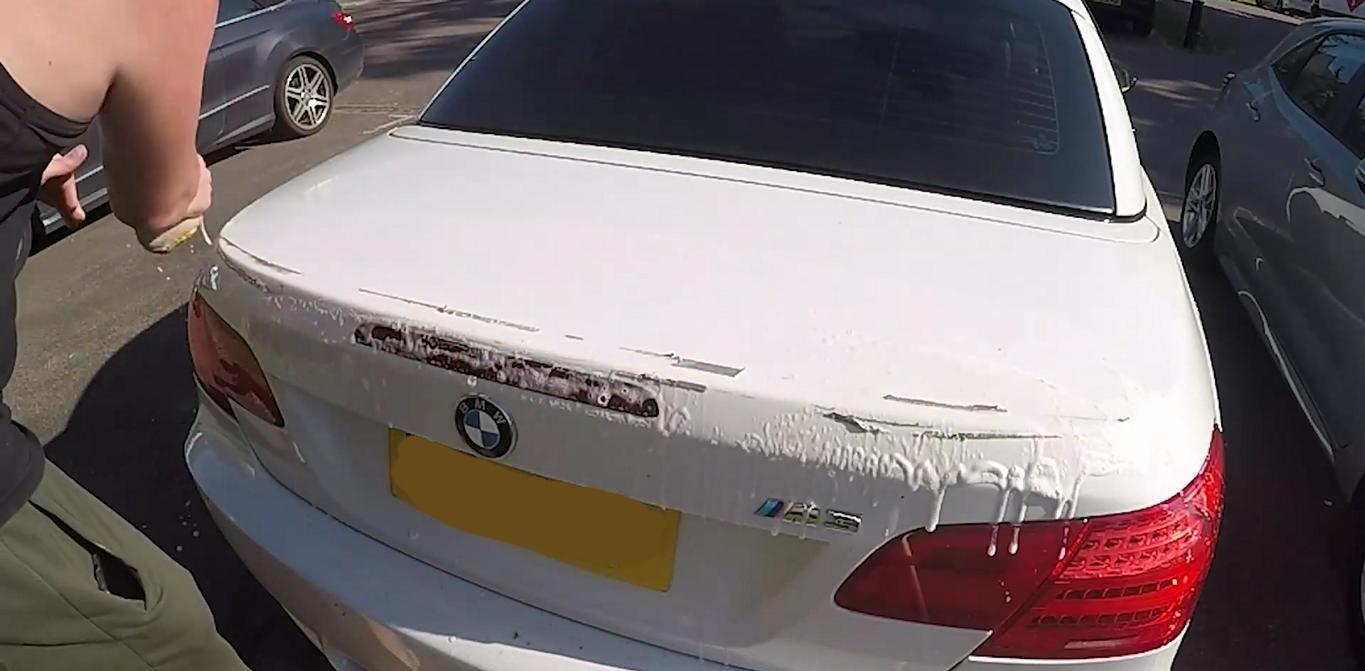
- Remnants of the adhesive can often be easily removed with your fingers
– alternatively one foil eraser (Eraser disc, decorative strip eraser) together with a cordless screwdriver/drill (approach carefully and with little pressure and speed)
- alternatively can also with Label remover/sticker and adhesive residue remover to be worked (first check for compatibility in an inconspicuous area and follow the manufacturer's instructions) - the position with paint polish clean and if necessary wax and seal
Info: In principle, the process mentioned above can also be used for components that body glue are attached. At least the unwanted component should be able to be detached with it. However, removing any residue of the bodywork adhesive is much more difficult. Depending on the age and type of adhesive, it may be that removal is only possible with damage to the paintwork and the component then has to be repainted.
Remove model lettering
Incidentally, the procedure for removing various model logos on the vehicle is almost identical. We explain exactly how this works in our article "Remove car lettering / manufacturer name? Our guide!".
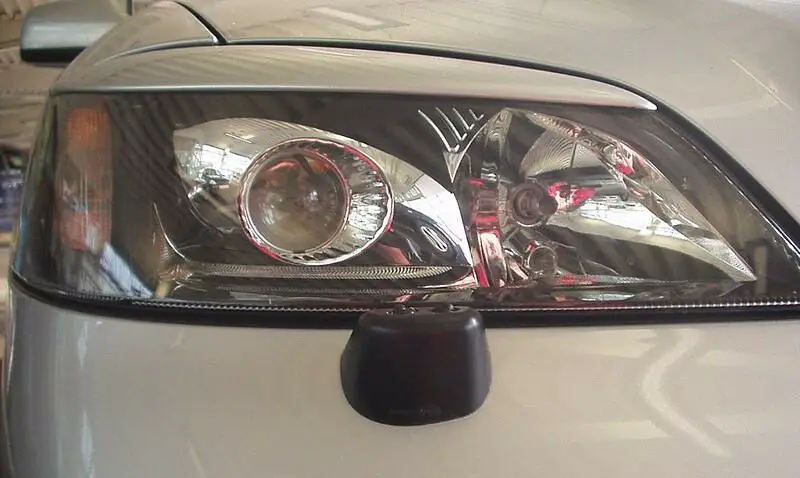
Remove headlight bezels?
Here, too, the process is comparable to removing the spoiler lip or a model lettering on the rear. If the vehicle's headlights are made of glass (in older vehicles), then after removing the headlight bezels using a fishing line or window cutting line, you can remove the adhesive residue relatively easily with turpentine, brake cleaner or nail polish remover. However, if the headlights are made of plastic, as is the case with almost all modern vehicles, then you should use solvents very carefully work around so that the headlights do not become blind and are thus permanently damaged. The same applies to working with a hot air gun.
The following note is essential: For safety reasons, tuningblog recommends all repair, inspection and maintenance work exclusively to be carried out in a specialist workshop! Although our information is summarized to the best of our knowledge and belief, we cannot assume any liability for the content. All information is therefore "without guarantee".
Of course, that wasn't the end of it!
In this tuningblog category there are guides and instructions for common defects/repairs on the vehicle and for installing accessories/tuning parts. Our articles explain in a simple way common defects and the corresponding repairs and they also explain how the first signs of a defect become noticeable. In most cases, we also have initial clues to the repair instructions in our repair instructions approximate costs listed. The goal of ourAuto Repair Guide“ is to create a head start in knowledge for the next visit to the workshop with initial tips. This may save you from tedious troubleshooting and you may even be able to do small things yourself. The same applies, of course, to the installation of accessories/tuning parts. Here, too, we would like to help with the implementation with instructions and tips. There are many other posts on this as well. Below is an excerpt of the last and HERE there are all previous instructions.


