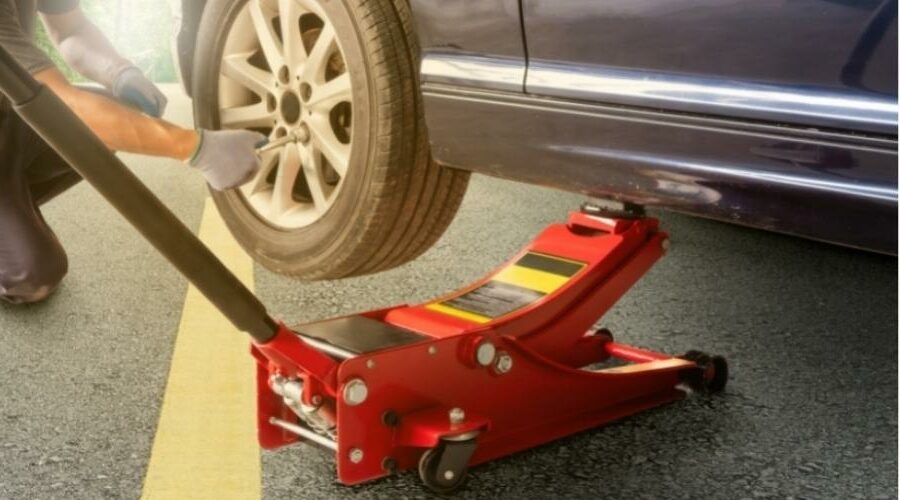
Many take the upcoming one Tire rotation from winter to summer (or vice versa), but it is important to consider a few aspects in order to swap the wheels correctly. Installation errors can have serious consequences. After removing the winter tires, the summer tires, the threads, the drives and the wheel bolts or wheel nuts should first be checked for possible damage. However, greasing the thread to prevent corrosion should be avoided be omitted, unless the vehicle manufacturer expressly gives the go-ahead and recommends appropriate lubricants. On the other hand, careful cleaning of the thread and the contact points between hub and rim with a wire brush is recommended.
torque and arrangement
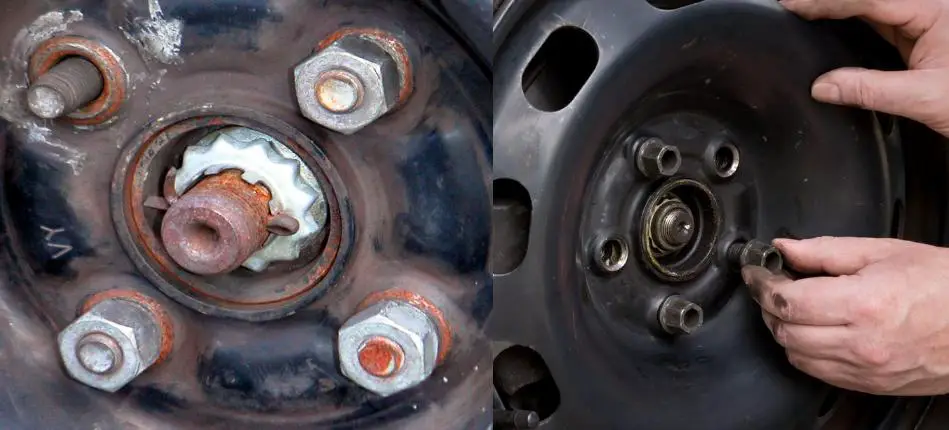
Once the wheel is balanced on the hub, the bolts should light be attracted. It is recommended that the screws are aligned vertically. Become Zentrierringe required, then install accordingly. If the wheel bolts (wheel nuts) can be screwed in without resistance, then they are not jammed. The final tightening must follow the prescribed sequence and that recommended by the manufacturer torque get noticed. For four-bolt hubs, proceed in a cross pattern (1-3-2-4). With five or six screws, on the other hand, a star-shaped arrangement is used. So always the opposite screw tighten. As a result, the rim lies evenly on the hub.
in the range of 110 to 130 Newton meters
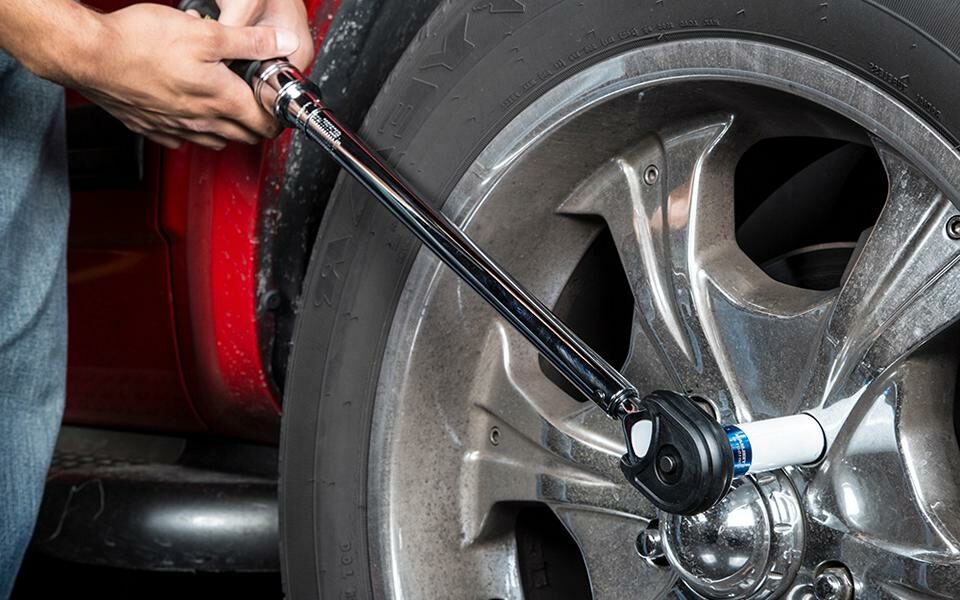
The torque required for tightening is given in the Vehicle documents or in the report (with any retrofit rims) to find. This value is often 110 to 120 Newton meters for aluminum rims. The right tool is a torque wrench. The screws should neither too loose nor too tight to be dressed. After driving 50 to 100 kilometers, it is advisable to check all screw connections after replacing the wheels. You should re- in a cruciform arrangement – tighten with the torque wrench. Although changing a tire is actually quite simple, some mistakes can increase the risk. This applies in particular to tightening the screws. The correct torque and the correct sequence are of crucial importance here.
The following note is essential: For safety reasons, tuningblog recommends all repair, inspection and maintenance work exclusively to be carried out in a specialist workshop! Although our information is summarized to the best of our knowledge and belief, we cannot assume any liability for the content. All information is therefore "without guarantee".
Of course, that wasn't the end of it!
In this tuningblog category there are guides and instructions for common defects/repairs on the vehicle and for installing accessories/tuning parts. Our articles explain in a simple way common defects and the corresponding repairs and they also explain how the first signs of a defect become noticeable. In most cases, we also have initial clues to the repair instructions in our repair instructions approximate costs listed.
The goal of ourAuto Repair Guide“ is to create a head start in knowledge for the next visit to the workshop with initial tips. This may save you from tedious troubleshooting and you may even be able to do small things yourself. The same applies, of course, to the installation of accessories/tuning parts. Here, too, we would like to help with the implementation with instructions and tips. There are many other posts on this as well. Below is an excerpt of the last and HERE there are all previous instructions.