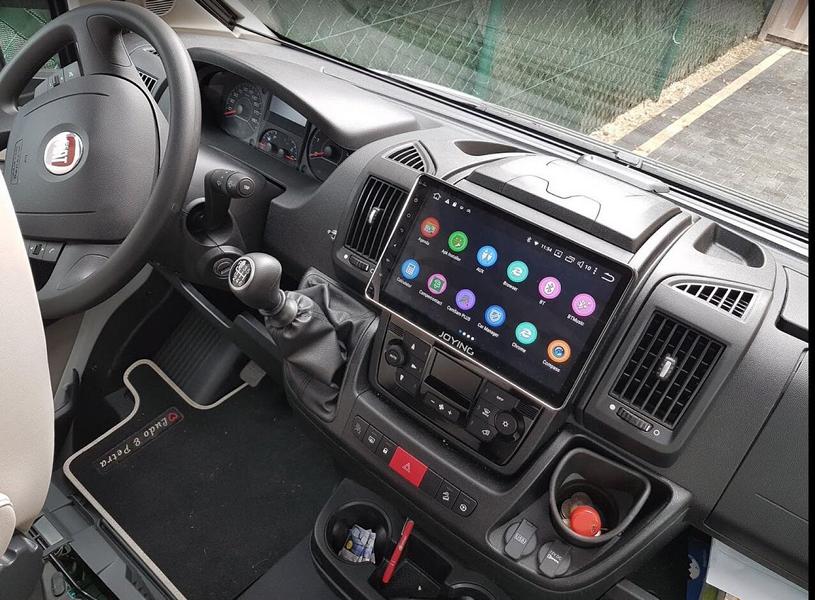
Why a new car radio? In order to be on the cutting edge of technology, even in an older vehicle, there are nowadays classic car radios for upgrade with the latest infotainment. Even if the DIN slot has long gone out of fashion, many technology fans use it to turn their aging car radios replace. The technical advance is so rapid that, for example, some vehicles built in 2005 can still be used with one FM radio and CD player had to be satisfied, simply because that was the current state of the art. From the newer models is the Smartphone compatibility, Navigation system , and a DAB + radio indispensable, not to mention the gadgets like Voice control and Touchscreen. And since it is uneconomical to always buy a new car in order not to miss any technical innovations, you just retrofit. Fortunately, there are a large number of them here High-tech media receivers, which later Can also be built into older models and bring everything the technology freak's heart desires. And installation is usually easy even for laypeople if you stick to a certain sequence.
Installation of the car radio - that's how it works!

1. First of all, the car battery be disconnected to avoid the risk of a short circuit.
2. Then it is advisable to look at both the instructions of the radio to be installed as well as take a look at the Handbook of the vehicle. With some models it is important to pay attention to special characteristics, such as the Assignment of the pins on the ISO plugs.
3. The old radio has to be used first expanded will. To do this, start by dismantling the frame and, if possible, the Control unit. Usually it's not a big challenge.
4. If that's done, you can use the radio with the included Release pins pull out. These are usually laterally from the radio in (possibly hidden) Rails inserted, which remove the radio from the shaft to solve and pull out can. However, you have to proceed with caution here, if you pull too quickly, the cabling can loosen and are then difficult to reach.

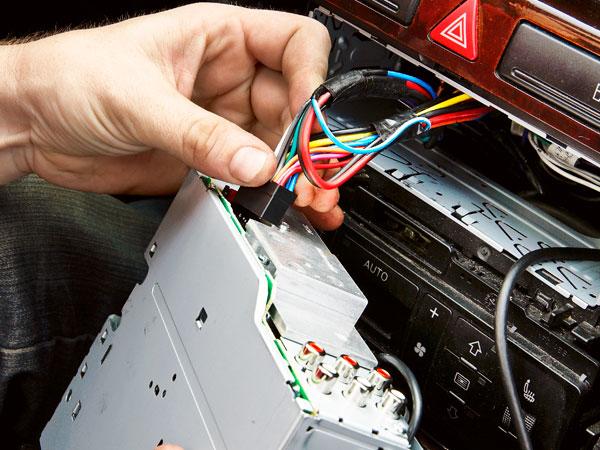
5. If you hold the radio in your hands, they will Connections on the old radio remote. Since the connections must be connected to the new radio, you must proceed carefully here so as not to damage them. It should be at least two insulation connections, for the power and Loudspeakers, and the Antenna connector demonstrate. There may be another connection available, depending on the model, this is for one amplifier intended.
6. Normally, the frame left in the shaft must now be removed. This may require a screwdriver to loosen the locking lugs. Should the radio have a antitheft have, could special tools be necessary.
7. Now the new radio can be unpacked and any existing ones sticker and Locking screws removed. Then loosen the installation frame of the new radio and insert it into the slot. The required tools are usually included in the scope of delivery. Is the frame in the shaft that Locking lugs Bend over and thus lock the frame. Here, too, it should be mentioned that any special tools required for a radio with an anti-theft device can be obtained from the manufacturer.
8. Then the new radio is plugged in affiliated. There is a risk of mixing them up with ISO plugs not, but it could be due to the manufacturer that the pins can be mixed up. For example at Audi, Volkswagen and Opel you have to do it often pins 4 and 7 on the ISO power plug exchange. A look at the manual and / or the operating instructions will help here.
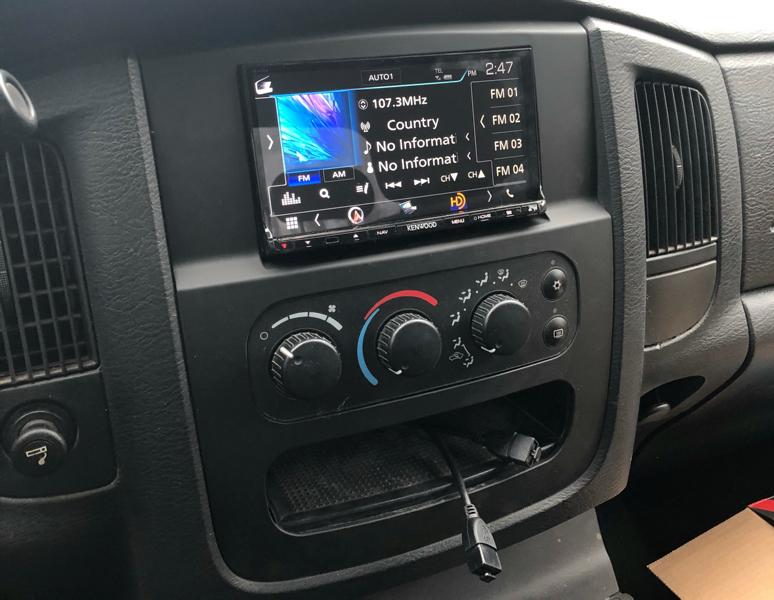
9. Once the cable and plug are connected, the radio is inserted into the slot, but not completely, as only the Features need to be checked. That's what the Car battery reconnected, the control panel, if present, attached and the radio switched on. If everything works properly, the radio can be pushed completely into the slot and the cover can be attached. By the way, is it a Double DIN radio, the installation is almost identical.
Tricks and tricks
Is the special tool included in the scope of delivery can no longer be found, should no experiments dare, but directly one Specialist workshop seek out. The risk of damage is too great. For the professionals, it is usually a minor matter and done in a very short time. Often it only costs a small fee and you have saved yourself a lot of trouble and time. However, if you would like to be able to report the removal and installation completely alone Once you have done it, you can borrow the necessary tools from a workshop you trust. There are also countless providers on the Internet.
It's more difficult Laying the cables. If the dimensions of the radio are very deep or the slot does not offer enough space, a Angled plug for the antenna cable Create a remedy, which is already available for retrofitting on many radios. This should make it easy to introduce the radio. If this is not the case, the cables must repositioned will. If you are unsure whether you are buying the right radio, you can simply remove the old radio beforehand and compare it directly when buying whether all the necessary connections are on and the radio fits securely.
If the vehicle is an older model, possibly an adapter which you have to plug between the cabling. Also from the older one 150 Ohm antenna input on a newer one 50 Ohm ISO antenna connection to be able to change becomes a corresponding one Adapter needed. However, the required adapters can be easily ordered with a click of the mouse.
If there is no DIN slot!
If the manhole is in a slightly newer vehicle unavailable the installation of a new radio turns out to be extremely complex. Here the radio is an integral part of the dashboard and not so easily expandable. If you want to do this despite everything, a complete replacement of the fairing along with all the buttons. In the meantime, special retrofit frames are offered for optical adjustment, but the plugs and their assignment are usually no longer standardized. Here it is imperative to be advance to inquire at the manufacturer and the exchange should not on your own without the necessary Improvement be performed. In newer vehicles, the electronics are as sensitive as they are complex. The risk of causing expensive damage here is great and you should therefore leave the installation and removal to the experts.
Replace an outdated infotainment system?

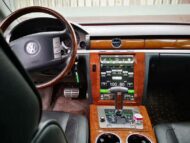
In more modern vehicles, the Infotainment system most of all vehicle functions are controlled. An exchange of such a system for an alternative is occasionally possible, but normally extremely Kompliziert and only rarely satisfactory. There are quite a few providers (often from China) even the infotainment system, for example the RNS810 from a VW Phaeton, change, against its own version, but usually neither the look nor the function is 100% satisfactory. It is more than questionable whether the settings for the chassis, the air conditioning or the auxiliary heating will continue to work.


Of course that had not happened yet!
tuningblog has countless other articles on the subject of car and auto tuning in stock. Do you want to see them all? Just click HERE and look around. In part, we would like to provide you with news but also off the tuning. In our category Tips, products, information & Co We have reviews of car or accessories manufacturers, new ones Tuning Wiki Terms or one or the other Leak veröffentlicht. Following an excerpt of the last articles:
|
Diesel Additive - All advantages of the additives at a glance
|
To protect the bike: What are tire cradles / tire protectors?
|
With these tips and tricks you can wrap your car yourself!
|


"Tuningblog.eu" - we keep you up to date on the subject of car tuning and car styling with our tuning magazine and we present you the latest tuned vehicles from all over the world every day. It's best to subscribe to ours Feed and will automatically be informed as soon as there is something new about this post, and of course also to all other contributions.