Recently updated on March 1, 2022 at 08:52 am
Many people have the problem at some point when the car no longer starts. Sometimes it's due to more serious damage, but mostly it's deposits on the battery terminals that cause it. Looking at the corroded battery terminals cleans, then this avoids unnecessary worries and higher expenses. And cleaning even works with a simple household remedy such as baking powder. Of course, to reduce the likelihood of shorting a wire, the engine should be off. There are two ways the cables are attached. Are the connections on the website, you usually need one 8 mm Wrench to loosen the nuts. Are the connections above, you usually need one 10mm or 12mm Key.
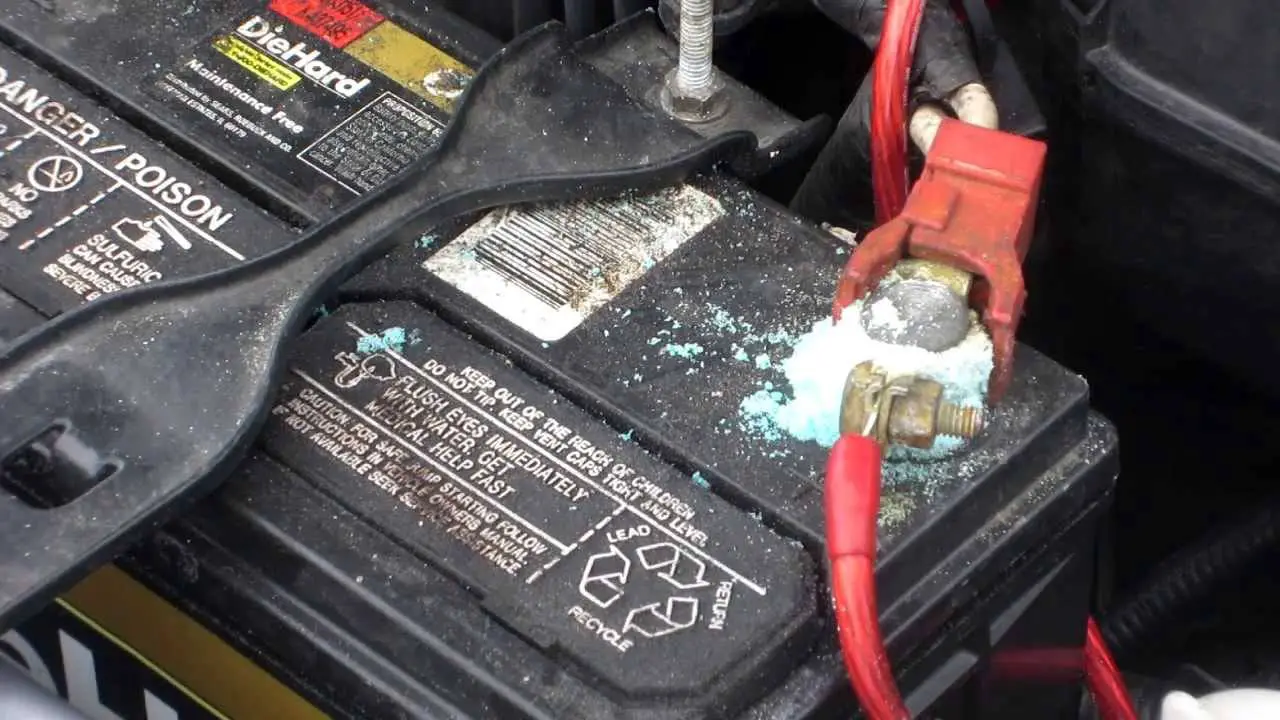
clean corroded car battery
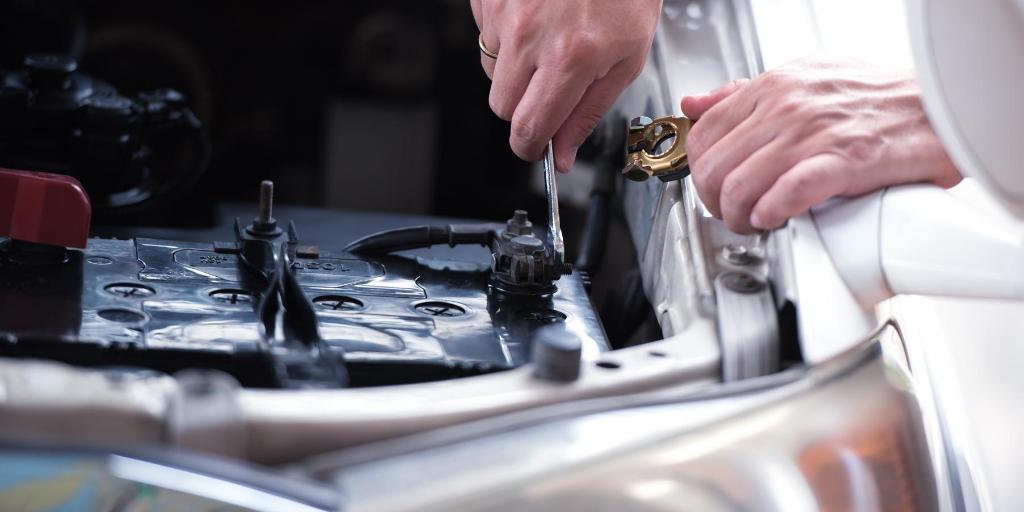
- Unscrew the nut from the negative cable clamp (ground cable) and remove the cable from the connector.
- Now do the same with the positive cable (positive pole).
- If you have trouble unplugging the cable, just wiggle it sideways and pull up.
- If there are cracks in the battery that are leaking acid, the battery must be replaced.
- The cables and terminals also need to be checked. If the scores are too severe, the parts must be replaced.
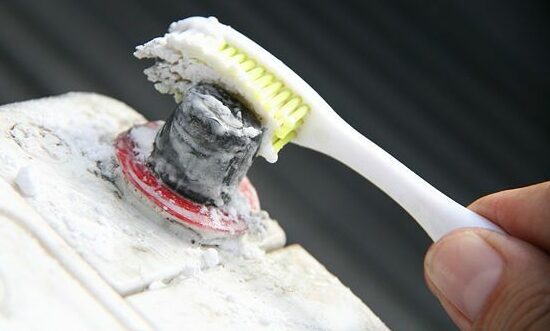
Cleaning with baking soda:
- A cup of water (250 ml) with a teaspoon (15 ml) Mix baking soda, dip it with an old toothbrush and the accumulated corrosion on the contact remove. The battery cables can be immersed in hot water to remove corrosion. the connections and clamps should be brushed with a toothbrush. Soak the toothbrush in the baking soda solution as often as possible when cleaning. Then rinse the battery and cable with cold water, removing all debris and the baking soda be washed away. Now the battery and clamps with a clean rag the abtrockn. Spray all metal parts (Clamps, poles and battery connections) with a Battery terminal protection spray or lubricate the parts with petroleum jelly one. Now the positive clamp should be reconnected to the positive terminal. Tighten the nut with the wrench. The same must now be done with the negative clamp. The last thing to check is the connections fixed are.
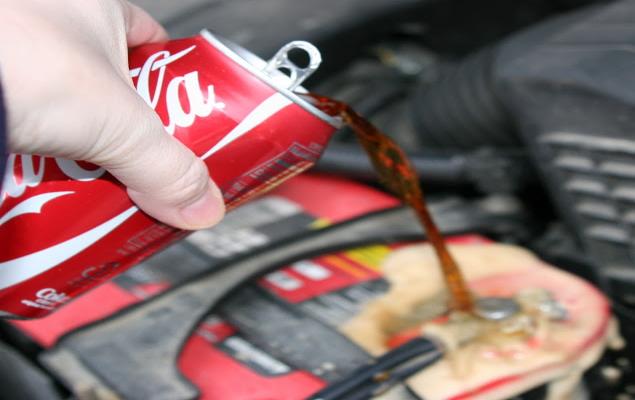
The quick emergency cleaning with cola:
- It's best to keep a wrench and a pair of gloves under the back seat or in the trunk. Then carefully open the two connections of the battery with the key(s) and the cables do not remove completely. Glue Pour outwards from the center in both directions. After a short exposure, wash the area with water. Retighten the poles and try to start the car.
- Info: Of course, this is only an “emergency solution”!
Tip: Some battery cleaning sprays contain an acid detector in the mix. These don't take that much time, but you have to read the package insert carefully, as each spray is different in use. If the deposits are too strong for a toothbrush, you can too Abrasive paper or battery pole brush use.
Always wear protective clothing
Bracelets and rings can get caught or cause a short circuit, so remove any jewelry beforehand. It is important that the negative ground cable is always removed first and reconnected last. This can avoid sparking.
https://youtu.be/9MgDN5-wkdM
Summary information to check the car battery:
- Check the battery with a voltmeter
- Switch off the ignition
– Remove the connection protection from the positive pole of the battery (clean the battery poles if necessary)
– Connect the positive cable from the voltmeter to the positive pole of the battery (the positive cable on the voltmeter is usually red)
– connect the negative cable of the voltmeter to the negative terminal of the battery
– Voltage should be between 12,4 and 12,7 volts
– Reading below 12,4V means the battery needs to be charged
– Charge the battery to “trickle charge” (then check again)
– Values above 12,9 V indicate excess voltage (remove the excess surface charge using high beams, heated seats, etc.) - an overvoltage can be an indication that the alternator is overcharging the battery
- Check the battery with a test lamp
- Switch off the ignition
– Remove the connection protection from the positive pole of the battery (clean the battery poles if necessary)
– Connect the positive cable of the test lamp to the positive pole of the battery (the positive cable of the test lamp is usually red)
– Connect the negative cable of the test lamp to the negative pole of the battery
– Hold the tip of the test lamp to the positive pole of the battery
– Read the voltage display on the test lamp - the voltage should be between 12,4 and 12,7 volts
– Reading below 12,4V means the battery needs to be charged - Check the battery by starting the engine
– Start the engine (turn the ignition key until the starter turns on)
- Hold for two seconds
– A second person checks the battery voltage drop
– Check the display on the test lamp at the time of starting
– the value should not fall below 9,6 V
– if this is the case, the battery will sulphate and will not hold any voltage - Info: Never short-circuit battery poles. Severe burns, damage to the poles and even a hydrogen gas explosion can occur.
What do you have to pay attention to so that the battery survives the winter well? What do you have to do to avoid a nasty surprise in the morning at low temperatures? Our information report on "Avoid these mistakes and the car battery will survive' sheds some light on this. (Back to overview)
The following note is essential: For safety reasons, tuningblog recommends all repair, inspection and maintenance work exclusively to be carried out in a specialist workshop! Although our information is summarized to the best of our knowledge and belief, we cannot assume any liability for the content. All information is therefore "without guarantee".
Of course, that wasn't the end of it!
In this tuningblog category there are guides and instructions for common defects/repairs on the vehicle and for installing accessories/tuning parts. Our articles explain in a simple way common defects and the corresponding repairs, as well as explaining how the first signs of a defect become noticeable. In most cases, we also have initial clues to the repair instructions in our repair instructions approximate The costs of the pending repair are listed. The goal of our subcategory “Auto Repair Guide“ is to create a head start in knowledge for the next visit to the workshop with initial tips. This may save you from tedious troubleshooting and small things can perhaps be done directly on your own. The same applies, of course, to the installation of accessories/tuning parts. Here, too, we would like to help with the implementation with instructions and tips. There are many other posts on this as well. Below is an excerpt of the last and HERE there are all previous instructions:
|
Defective air conditioning condenser? You have to pay attention to that!
|
Defective catalytic converter - signs, replacement and costs incurred
|
Adjust the handbrake? This is how it's done!
|


"tuningblog.eu" - we keep you up to date on the subject of autotuning and car styling with our tuning magazine and present you with the latest tuned vehicles from all over the world every day. It's best to subscribe to ours Feed and will automatically be informed as soon as there is something new about this post, and of course also to all other contributions.