Everyone knows the problem of minor damage to the paintwork on the car body. Whether they happen when parking or come from branches in a forest - they are always annoying. Professional removal of the scratches is usually expensive, so many people want to repair the damage themselves. In the following instructions you will find out what needs to be considered and how even non-professionals can easily and inexpensively repair paintwork damage with the help of a spray can.
This paintwork damage can be touched up with a spray can!

Not everyone Damage to the paintwork can be removed using the spray can. However, before spending huge sums on a professional repair in the workshop, it is worth checking the scratches and scuffs on the bodywork. If they are rather small, they can be touched up with a spray can. Laypersons should, however, pay attention to the correct way of working, so that the body does not show any faulty optics after the procedure. Advantages of repairing with the spray can:
- Inexpensive alternative
- Quick and easy
- Suitable for minor paintwork damage
Alternative repair options
Many who want to repair damage to the body use the alternative from the spray can. And in the case of particularly small damage to the paintwork, the so-called Touch-up pen for use. This looks like nail polish and is applied to the damage with the help of an applicator painted. However, these paint sticks are only suitable for minor damage, for example scratches caused by a stone chip. A spray can, on the other hand, comes for medium paint damage for use. However, it should be checked beforehand whether the damage is perhaps only superficial. In this case, it is often sufficient to to brush up – the damage then becomes invisible. In the case of dents or larger scratches, however, a specialist should be consulted and a professional repainting of the body / component is usually unavoidable in this case.
layers of paint on cars
In order to be as well prepared as possible for the repair job, you should pay attention to the different layers of paint. The top layer of car paint is the clearcoat. Below this are three more coats of paint. The second coat of paint determines the Color of the car. Spray cans should therefore match the color of the second layer. Below is one wood protection primer. By the way, it is recommended to apply another layer after the varnish has dried clearcoat to apply.
Proper use of spray cans
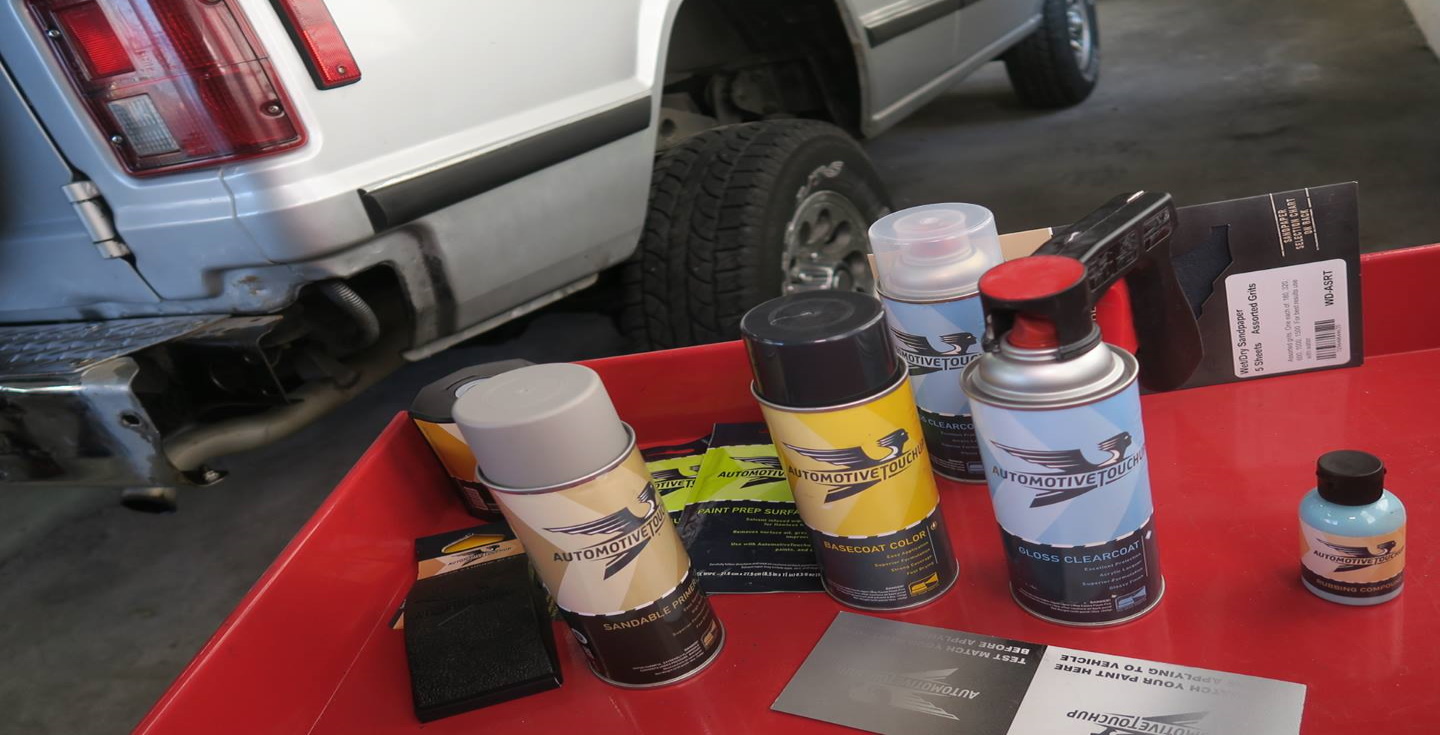
If you have decided to use a spray can for repairs, it is now the right shade to investigate. Various online shops and regional hardware stores offer a variety of different colors. However, before repairing the damage to the car, it is a good idea to test the paint from the can on an inconspicuous area of the bodywork to ensure that the shade matches the paint color of the car. Normally, a spray can should be enough to repair minor paint damage. To be on the safe side, you can also purchase two cans, but the rule of thumb is: If more than one can is required, professional repainting of the component should be considered.
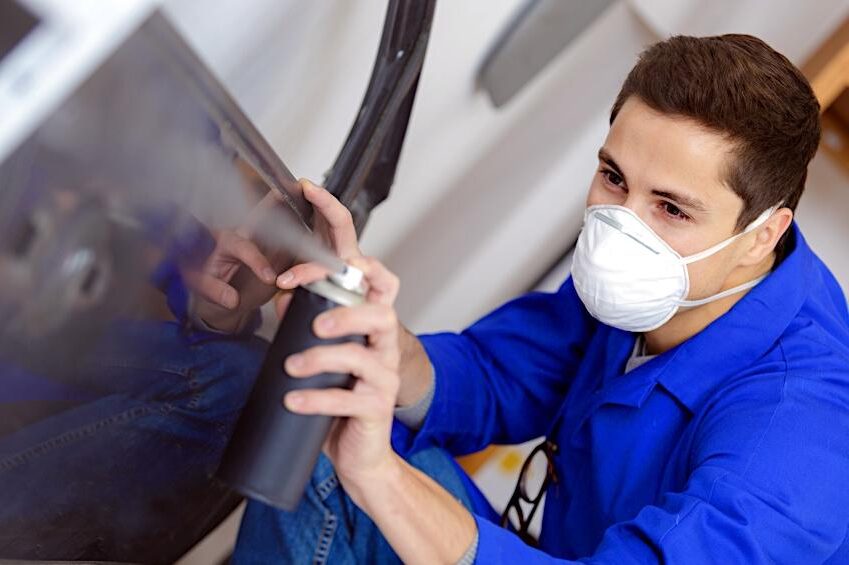
- Safety: When using the spray can, be careful of your own Security and Protection. Wear a mask, work gloves and, if necessary, coveralls when applying the paint.
- Cleanliness: The workplace and the car should in be thoroughly cleaned and free from grease and dust before the paint is applied. In addition, drafts should be excluded.
- Temperature: The paint should be applied with the spray can at around 20 degrees Celsius in order to achieve optimal results.
Further measures when working with spray cans!
Even laypeople can learn how to use the spray can in no time at all. However, in order to achieve a passable result when applying paint, in advance some points to be considered. Shake the can in the application extensively. The guideline here is about two minutes. Spraying free is recommended, especially for newer cans. This means that you let the spray can spray briefly in a harmless area so that the subsequent sprays are more even. When applying paint, it is best to spray from a distance of about 15 centimeters for best results. If you want to spray multiple coats, this should not at once done - leave each layer the abtrockn. The drying process of a coat of paint usually takes only five minutes. For visual reasons, it is recommended several thin layers applied, as the result will then be more even.
Detailed instructions for repairing the paint damage
- grinding: The damaged area should be light in advance sanded down will. A fine grit is suitable for this – preferably a 400 grade.
- matte finish: The subsequent matt sanding is done with water.
- silicone remover: With the help of a silicone remover, the damaged area is freed from dirt and cleaned.
- Masking: Now comes the masking. For this you can use conventional newspaper and adhesive tape.
- Attach foam tape: If you want a soft edge after applying the paint, it's a good idea to attach a round foam tape.
- Primer: The primer should be sprayed on before the actual application of paint. About two to three layers are recommended. Allow the primer to dry completely before proceeding to step 7.
- grinding: Now sand again, but this time a 600 or 800 grit should be used in combination with water. This allows better adhesion of the next layer of paint.
- Cleaning: The damaged area should be cleaned with a silicone remover after each grinding process.
- Application of the base coat: This is applied in a similar way to the primer. Apply two or three layers and then let the paint dry again.
- clear coat: Now comes the clear coat. An application of about two layers is usually sufficient. Work as precisely as possible.
- Removing the tape: To prevent the dried paint from being torn off with the adhesive tape, you should remove it again after a short drying time.
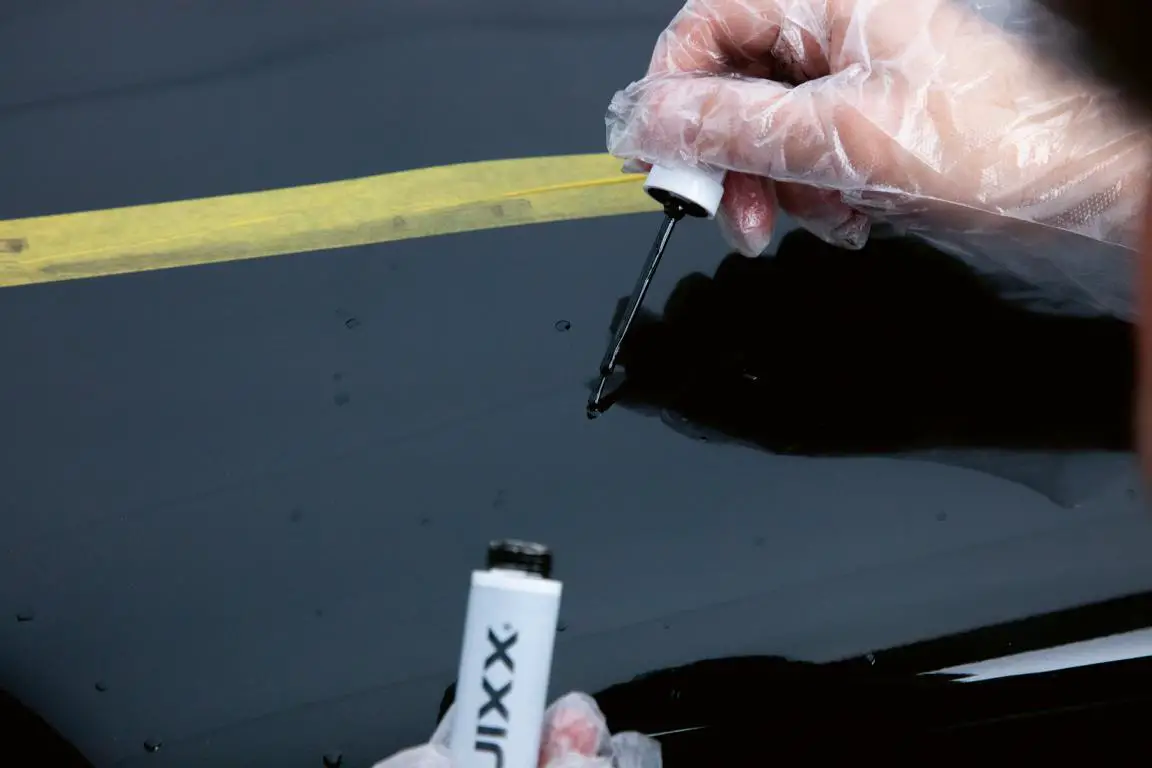
- Respray: After the successful touch-up, you should apply a blending thinner. This prevents visually disturbing edges.
After successful drying, a polish should be carried out. A suitable for this task 2000 grade sandpaper. Sanding should be done wet to remove any smaller inclusions of dust. Afterwards the final polish carried out - make sure that everything is dry. Drying overnight is recommended.
The difference between 2K and 1K clear coat
A 2K clear coat is handled differently than a 1K clear coat. The “K” stands for “components”. With a 2K clear coat, these consist of acrylic resins and hardeners. When repairing damage to the paintwork on the body, a 2K clear coat is recommended, as it is far more resistant to chemicals and weathering than a 1K clear coat. In addition, a 2K clear coat dries faster.
Proper storage of spray cans
After the successful completion of the repair, you do not have to dispose of the spray can immediately if there is still some paint in it. For proper storage, the nozzle and suction tube should be cleaned. To do this, it is best to hold the can upside down and press the spray head until no more paint is sprayed. With the help of this trick, the spray can can be stored longer, even once it has been opened.

The following note is essential: For safety reasons, tuningblog recommends all repair, inspection and maintenance work exclusively to be carried out in a specialist workshop! Although our information is summarized to the best of our knowledge and belief, we cannot assume any liability for the content. All information is therefore "without guarantee".
Of course, that wasn't the end of it!
In this tuningblog category there are guides and instructions for common defects/repairs on the vehicle and for installing accessories/tuning parts. Our articles explain in a simple way common defects and the corresponding repairs and they also explain how the first signs of a defect become noticeable. In most cases, we also have initial clues to the repair instructions in our repair instructions approximate costs listed. The goal of ourAuto Repair Guide“ is to create a head start in knowledge for the next visit to the workshop with initial tips. This may save you from tedious troubleshooting and you may even be able to do small things yourself. The same applies, of course, to the installation of accessories/tuning parts. Here, too, we would like to help with the implementation with instructions and tips. There are many other posts on this as well. Below is an excerpt of the last and HERE there are all previous instructions.


Good to know that 2000 grit sandpaper works well for polishing. My Tesla has a body fault and I want to fix it as soon as possible. Hopefully I can find a reliable Tesla Approved Body Shop for this.
Up to now I wasn't very familiar with the repair with the spray can. However, this blog was able to help me to learn more about the topic. Since the article was pleasant to read, I would like to thank you for it.