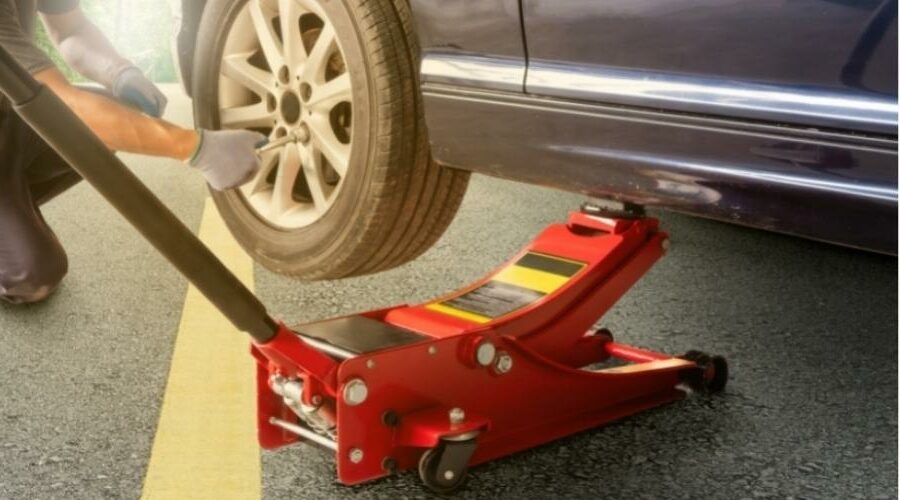
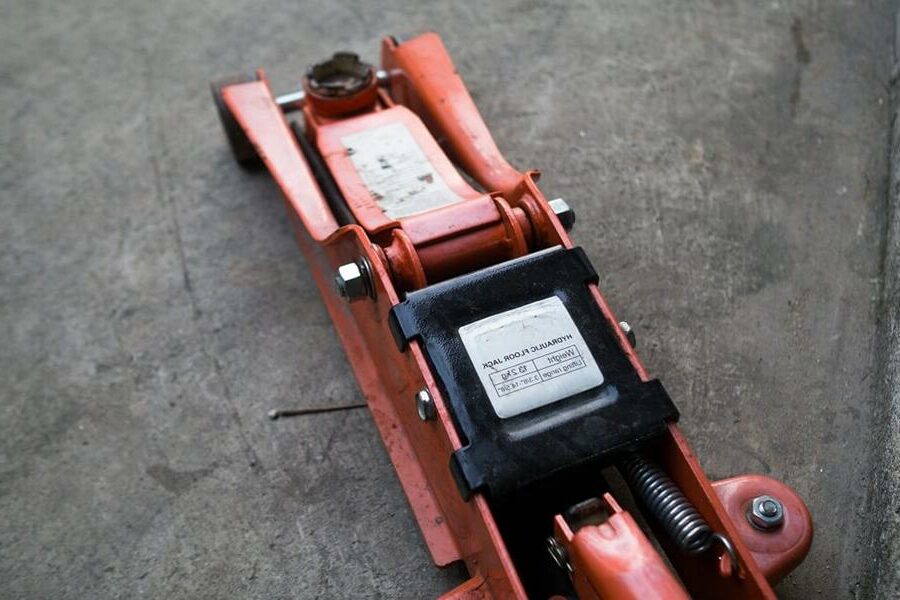
How is oil refilled in a hydraulic jack? Anyone who needs to lift a heavy object like a car or truck will appreciate one hydraulic jack. However, this device requires one for its system oil lubrication. A newly purchased model may need to be filled with oil before it is used for the first time. A copy that is already in use, on the other hand, requires regularly fresh oil. To top up the oil, only the cover and the filler plug need to be removed. Fresh oil can now be poured into the oil chamber of the jack. Now I have to be vented and the hydraulic jack is ready for use again. For this, the jack should stand on a level surface. It stands securely and cannot roll away on its own. The oil level can be read and adjusted perfectly. The place where the oil is to be filled into the jack should also be allowed to get dirty. When filling, a little oil can quickly go wrong. If in doubt, it helps to put a plastic tarpaulin underneath.
Open the pressure release valve.
- Opening the pressure release valve ensures that the jack lowers and access to the filler plug is free. There are different methods for the release mechanisms depending on the jack model. On some models, the handle should be rotated counterclockwise.
- If both variants of lowering the jack do not work, a look at the user manual will help.
- During the work, the drain valve should remain open.
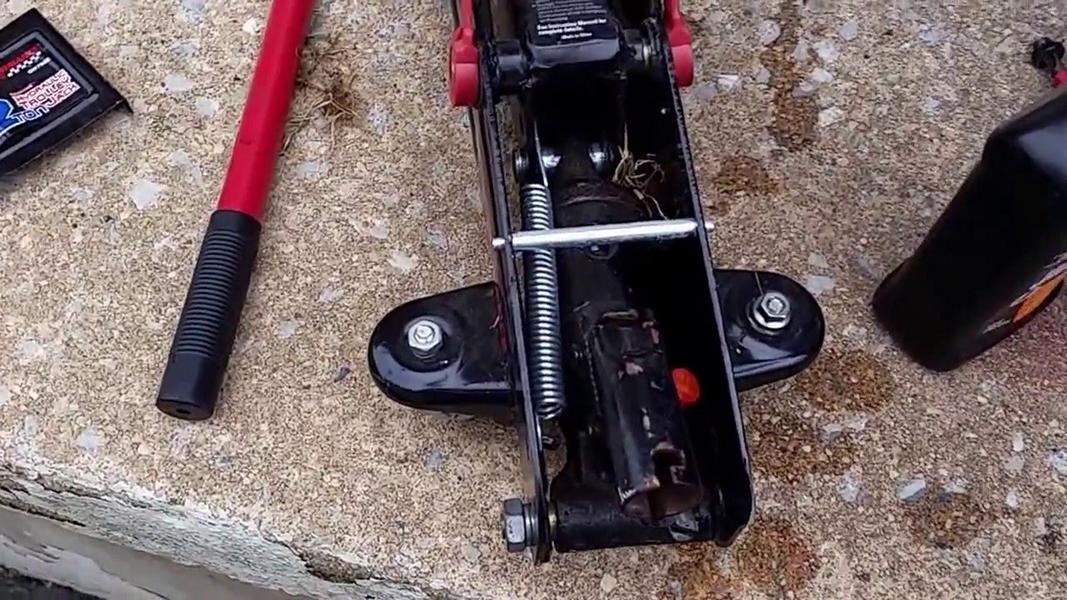
If the jack has a cover plate to protect the internal components, it will need to be removed. So remove all screws and lift off the cover plate.
- On some models, the plate can be raised completely. For others, it can only be raised. If the panel can be taken completely to one side, it should be safely placed to one side.
- In most cases, a Phillips screwdriver is sufficient to loosen the screws.
- The removed screws should also be put aside safely.
Now wipe the area around the nozzle clean with a cloth so that the system does not get dirty. This ensures that no dirt gets inside the jack.
- On older models, a thick layer of dirt may have formed around the filler neck. Then the nozzle must be cleaned.
Now the filler plug must be removed. As a rule, the plug is located under the cover. Depending on the model, it is removed or screwed out. If the plug is only inserted, it can be removed with a flat screwdriver. Simply insert the screwdriver on the side of the plug and pry it out.
- If the filler neck cannot be found, the manual will help here under guarantee.
- The removal of the plug must be done with caution because it must not be confirmed. So don't force anything.
Now the oil tank can be filled with new oil for the jack. Sufficient oil should be filled in so that the level is at the indicated level. Now remove excess oil from the nozzle. The plug can now be reinserted or rotated. Pay attention to cleanliness.
- Nothing goes wrong with a filling funnel.
- It is important that jack oil is used for topping up. Motor oil is not an alternative. Brake fluid doesn't work at all.

Now put the plug back in. Insert as removed, either push in or turn clockwise, or as the model dictates. Once the plug is back in place, the jack needs to be bled.
- Do not put the cover back on yet, it would likely interfere with venting.
- There are models where the filler neck must also be open when bleeding. The user manual provides information on this.
Is the drain valve still open? It should remain open to vent. The jack must be lowered completely, i.e. open the lowering mechanism completely. Leave the valve open when bleeding.
- During the filling of the new oil, air may have accumulated in the jack system, that's why Bleeding important. With air in the system, the jack cannot lift or hold the load properly. If he were to sag during his work assignment, it could have dangerous consequences.
The air must be removed from the system for the jack to function properly. With the release valve open, quickly squeeze the handle 10 to 15 times. This forces the air out of the system. As long as the release valve is open, the jack should not be raised. If it still moves up, check the release valve. Is it fully open?
- A look at the manual reveals how the air is removed from the corresponding jack.
Now the release valve can be closed and the jack can do a test run. Start pumping until the jack is all the way up and then release. He should move evenly.
- If the jack jerks during its test run, there could still be air in the system. So repeat the venting.
If the test run went through without any abnormalities, the cover can be put back on and screwed tight.
- Only jack oil may be used. If the wrong oil is used, the jack can drop unintentionally and cause dangerous situations.
- Check the steps in the manual before starting the activity. Each jack model has differences.
The following note is essential: For safety reasons, tuningblog recommends all repair, inspection and maintenance work exclusively to be carried out in a specialist workshop! Although our information is summarized to the best of our knowledge and belief, we cannot assume any liability for the content. All information is therefore "without guarantee".
Of course, that wasn't the end of it!
In this tuningblog category there are guides and instructions for common defects/repairs on the vehicle and for installing accessories/tuning parts. Our articles explain in a simple way common defects and the corresponding repairs, as well as explaining how the first signs of a defect become noticeable. In most cases, we also have initial clues to the repair instructions in our repair instructions approximate The costs of the pending repair are listed. The goal of our subcategory “Auto Repair Guide“ is to create a head start in knowledge for the next visit to the workshop with initial tips. This may save you from tedious troubleshooting and small things can perhaps be done directly on your own. The same applies, of course, to the installation of accessories/tuning parts. Here, too, we would like to help with the implementation with instructions and tips. There are many other posts on this as well. Below is an excerpt of the last and HERE there are all previous instructions:
|
Symptoms, repairs and costs of a defective ignition switch!
|
Symptoms, repair / replacement, costs of a defective ignition coil!
|
Cylinder head / cylinder head gasket defective? The info!
|


"tuningblog.eu" - we keep you up to date on the subject of autotuning and car styling with our tuning magazine and present you with the latest tuned vehicles from all over the world every day. It's best to subscribe to ours Feed and will automatically be informed as soon as there is something new about this post, and of course also to all other contributions.