Recently updated on January 27, 2022 at 10:49 am

Lowered cars are extremely popular with many drivers. In particular, lowered vehicles, which also have wider tires and a wide track, make the tuner's heart beat faster: Such a vehicle is at least optically reminiscent of those sports cars that you see on the racetrack, among other things. The vast majority of tuners do not lower their vehicle because they hope it will provide more performance, but it is usually only about improving the look of the vehicle. A method that is often used to lower vehicles and which is also cheap is the assembly of so-called Lowering springs. Such lowering springs are often also called sport springs. When installing yourself, however, there are a few things to consider - we will explain what these are in the following using a small car as an example.
Lowering springs / chassis - installation instructions
 Who is only interested in very specific areas around the topic Lowering springs / chassis - installation instructions iIf you are interested, you can use the following jump labels to navigate directly to the desired topic with just one click. And just as quickly you can return to this overview from the selected menu item with just one click. However, we recommend our readers to always read through the entire article. Some menu items are only really comprehensible and understandable once the complete information article has been read.
- Installation of the lowering springs
- Remove windshield wiper with puller
- Mounting of the shock absorber with expanding socket widths
- Convert the strut for the springs!
- How does the lowering work on the rear axle?
- Now the vehicle is lowered!
- Installation of the chassis / coilover kit
- Legal conditions - lowering springs / chassis
- Tutorials for installing the chassis or springs
- Summary, what is needed?
- Final information on DIY installation
- Tip: this is how you drive a lowered car!
Installation of the lowering springs
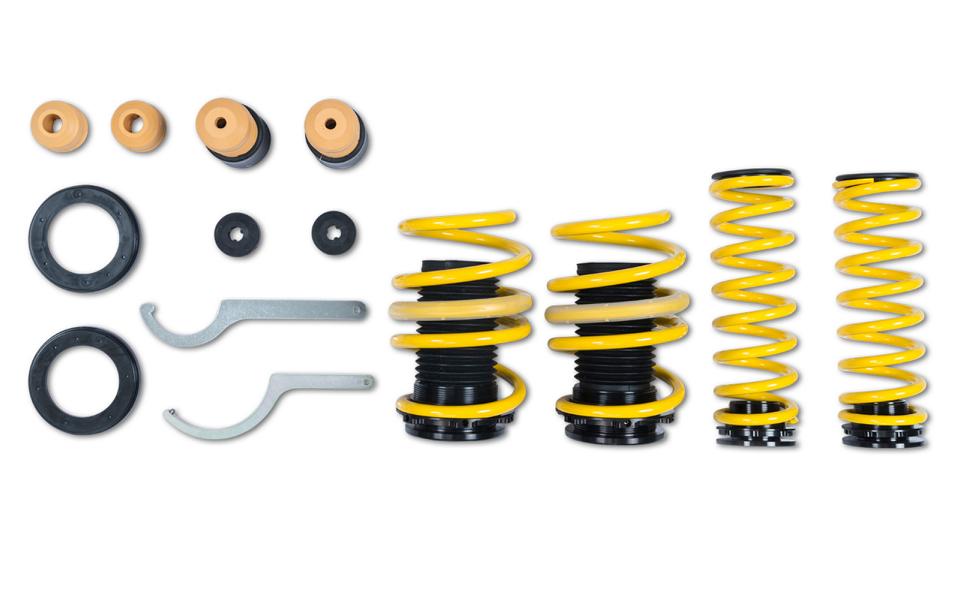
Let us assume that we have a small car with two individual struts at the front (often McPherson axis) and with the rear wheels on a twist beam axle (Split damper and spring) are mounted. So you need a corresponding set of lowering springs for the front axle and a corresponding set for the rear axle. It doesn't matter on which side you start with the removal, because all four springs of the vehicle have to be replaced anyway. In our case, we start on the front by removing the shock absorber. With most vehicles, it is now necessary to remove the cathedral bearings. Some Top Mounts are installed in such a way that they are located under the cowl, which is why it may sometimes be necessary to dismantle the windscreen wipers. Back to overview
Remove windshield wiper with puller
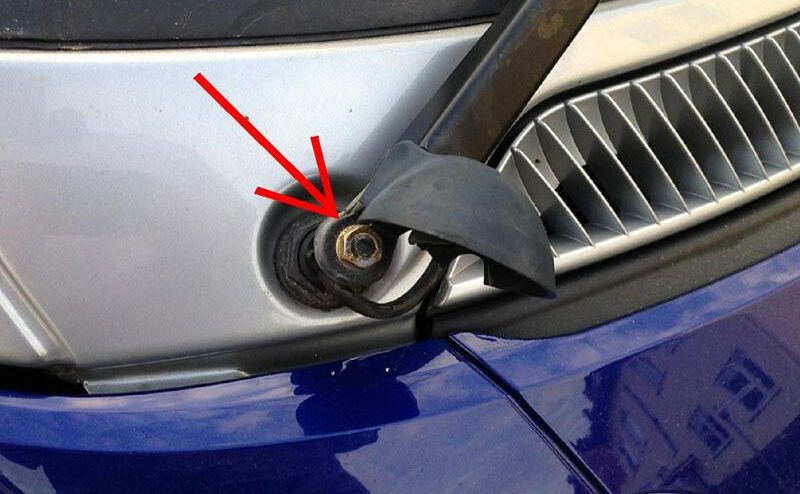
The best way to remove the windshield wipers is to use a puller. Then pull off the rubber seal that is usually present on the draft shield and then carefully pull the cowl upwards. Then detach it from the windshield. Note that some parts are still clipped into the sides and need to be removed. When you are done with that, you need the Remove the wheels from the vehicle.
Tip: New components such as a new engine should be "run in" gently. And that also applies to a new car.
Then remove the ABS sensor and the brake line from the shock absorber on each side. With the ABS sensor cable, this is usually relatively easy, as you usually only have to unhook the sensor. In the case of the brake hose, however, an additional retaining clip often has to be removed. Then you have to remove any coupling rod on the shock absorber and then the retaining screw of the shock absorber. Back to overview
Mounting of the shock absorber with expanding socket widths
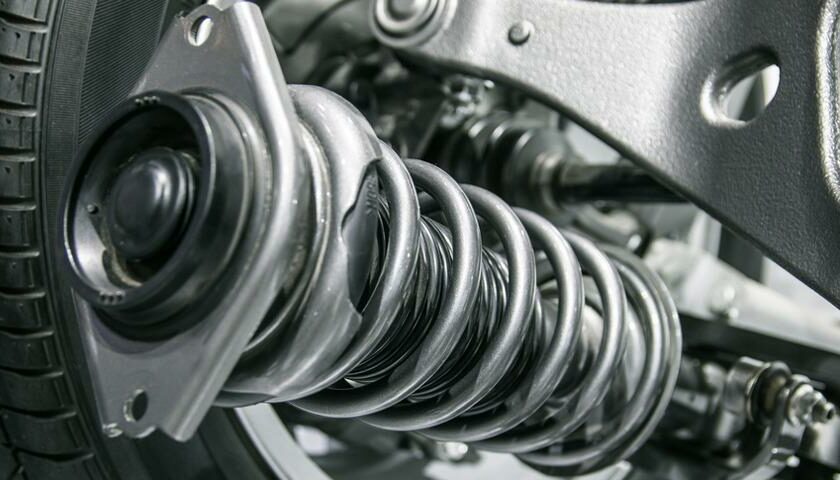
In order to be able to pull out the shock absorber, you often first have to widen the mounting of the shock absorber using an expanding nut. Once you have loosened the nut of the dome bearing, you can easily pull out the shock absorber. Make sure, however, that you only turn the support bearing nut and not the piston rod on the shock absorber. Back to overview
Convert the strut for the springs!
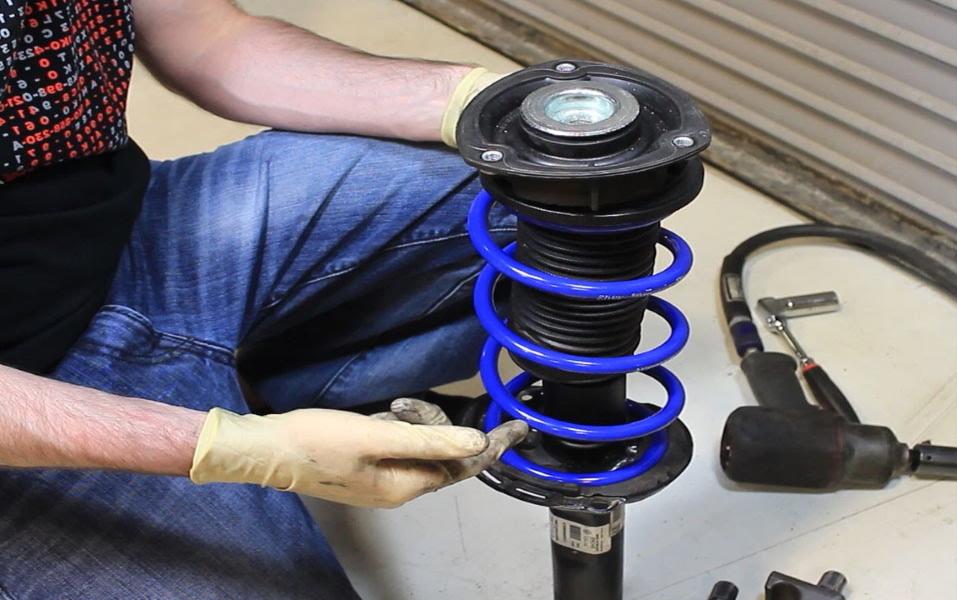
If the shock absorber is removed, you can easily do it with a Spring tensioner press together. This allows you to loosen the central nut and also dismantle the upper spring plate. Then you can pull the shock absorber together with the so-called protection kit and the lower spring plate out of the old spring. Here it is extremely important that you use the spring compressor check several timesto ensure a proper fit, otherwise serious injuries can occur, which of course must be avoided. You should also make sure that the spring is installed in the correct direction. You can recognize this by the fact that you can read the imprints on the nib in the assembled state. The spring plates also have an attachment point. The end of the spring should be at the top and bottom of this attachment point. Now fix the upper spring plate with the central nut, whereby you should pay attention to the correct torque. If you have followed all these steps correctly, you can now mount the new spring in exactly the reverse order. Repeat the process with the other shock absorber. Back to overview
How does the lowering work on the rear axle?
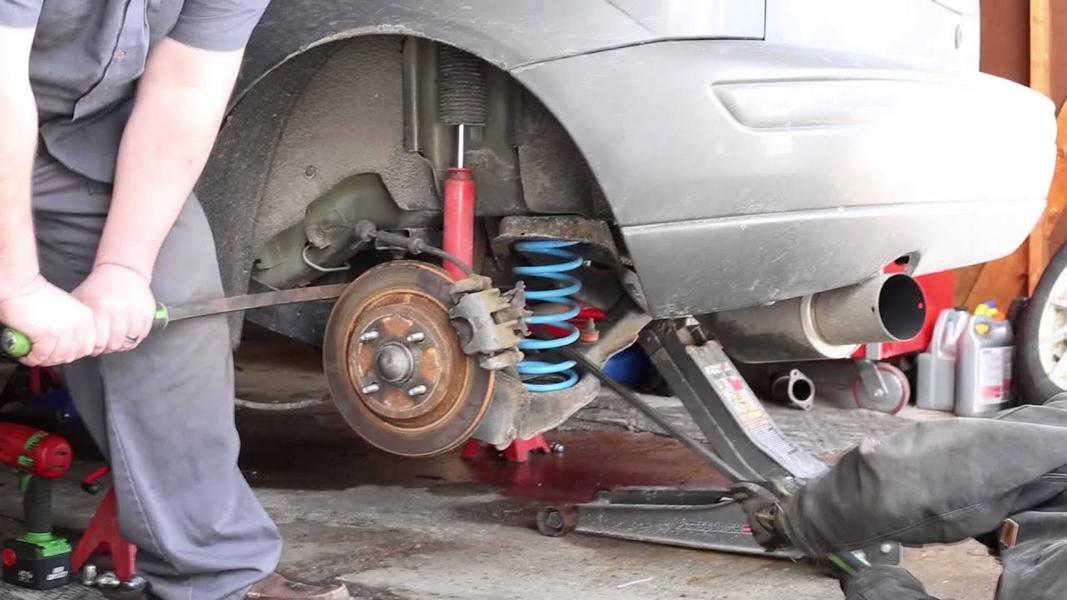
Here too, of course, the wheels must be removed first. Then support the axle accordingly using a gearbox jack. Make sure that only the trailing arm is actually loaded and not the steering knuckle or the brake. If the process is carried out in a garage, then you can instead of the gearbox jack maybe also use an additional jack. When the rear axle is now on the ground, loosen the retaining screw of the shock absorber and pull the axle down until you can remove the spring. Now mount the upper spring plate including the new lowering spring in the corresponding place in reverse order. If this is more worn out, you can also consider replacing it right away. Here, too, you can tell the right direction during installation by whether you can read the imprints or not. Finally, attach the shock absorber and put the wheels back on the vehicle. If the vehicle has the McPherson constellation with shock absorbers and springs on the rear axle as on the front axle, the installation essentially corresponds to that of the front axle. Back to overview
Now the vehicle is lowered!
Once the steps have been carried out, the car is lowered and all you have to do is have a wheel alignment carried out in the workshop so that the tires do not wear out unnecessarily. Back to overview
Installation of the chassis / coilover kit
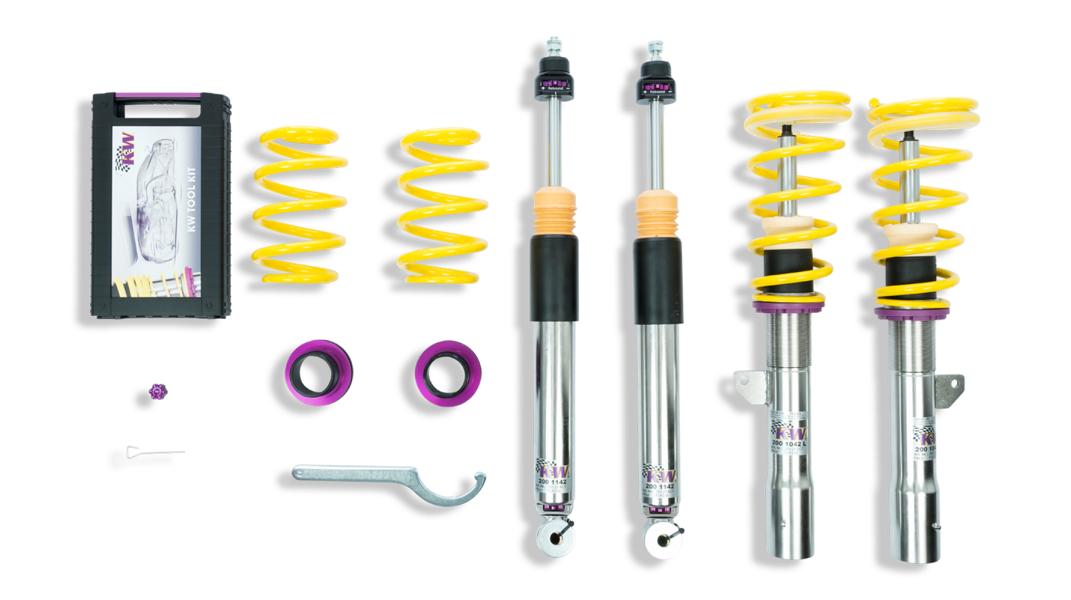
Have you signed up for one Sports suspension / coilover suspension decided, the installation is essentially identical. Here, too, the dampers have to be completely removed. Only the work step with exchanging the springs and the spring tensioner is omitted. Instead, the completely new shock absorber of the sports suspension is installed. The same applies to the rear axle. Here either completely new struts are installed or, depending on the vehicle type, only springs in the known positions. Back to overview
Legal conditions - lowering springs / chassis

Note that lowering springs by means of modification acceptance must be entered. So you should pay attention when buying whether a Teilegutachten or General operating permit / ABE present. Lowering springs that have a parts certificate must be approved by an inspector from TÜV or Dekra, who certifies proper installation. Sport springs with ABE do not have to be registered. If everything is in order, you will receive an expert opinion, which you can present to the admissions office so that the change can be entered in your papers.
Tutorials for installing the chassis or springs
Summary, what is needed?

A lifting platform is required for the conversion of the chassis. A jack is usually also possible, but you cannot work safely and comfortably with it. This requires good tools, in the case of sport springs, a spring compressor and a little time. The best thing to do is drive to the nearest free workshop and rent a free lifting platform for about 3-4 hours. There you can perhaps borrow a spring compressor and other suitable tools. Back to overview
Final information on DIY installation
Of course, it is possible to install the coilover kit, the sports suspension or the sports springs yourself. As a rule, it does not require any great specialist knowledge to install a chassis on an average vehicle. Car mechanics and people in a technical profession will have no difficulty installing the new components. But if you are less skilled in terms of craftsmanship, the installation should be left to the specialist. The price for installing a chassis or the springs can of course vary depending on the workshop and vehicle type. As a rule, however, you should expect costs between € 100 and € 400. There is also a wheel alignment. Back to overview
PS: For lowered Vehicles is one flat jack especially. In our post "All information about flat jacks for tuned cars!" there is more information on the subject.

Of course that had not happened yet!
tuningblog has countless other articles on the subject of car and auto tuning in stock. Do you want to see them all? Just click HERE and look around. In part, we would like to provide you with news but also off the tuning. In our category Tips, products, information & Co We have reviews of car or accessories manufacturers, new ones Tuning Wiki Terms or one or the other Leak veröffentlicht. Following an excerpt of the last articles:
|
Test report: OBDeleven NextGen PRO VAG diagnostic tool!
|
Elegant - extended ambient lighting from SCHAWE!
|
Staggered Wheels rims: what kind of rims are they?
|


"Tuningblog.eu" - we keep you up to date on the subject of car tuning and car styling with our tuning magazine and we present you the latest tuned vehicles from all over the world every day. It's best to subscribe to ours Feed and will automatically be informed as soon as there is something new about this post, and of course also to all other contributions.
Good to know that at the beginning you often have to widen the mounting of the shock absorber with an expanding socket. My car needs to be repaired and new compression springs are due. The best thing to do is to contact an expert who can make compression springs.