Recently updated on January 28, 2022 at 11:46 am
The view can be severely restricted by Scratches in the window. But with a small one Smart repair Procedure they can be removed in most cases on your own. And we wanted to try that out once. For example, the company Quixx offers a smart repair method for only 19,95 euros Glass scratch remover. But how good is the product actually? We tried it out! No matter whether the windshield wiper rubbed dry on a dirty windshield, something fell on the windshield, or whether it was stupidly cleared of the ice with a CD cover, there are many reasons for scratches on the car window. But especially one scratched windshield can ensure that you are flying blind, especially when the sun is low.
Scratches polishing allowed?
Light and medium scratches that can be felt with the fingernail may actually be polished out. It looks different with deep scratches: The windshield is in most cases a load-bearing component and ensures the stability of the body. Therefore deep scratches are allowed not can simply be polished out. If the scratches are too deep, the probability is significantly higher that sooner or later the windshield will be in the area that was processed. rips. What is more important, however, is the obstructed view that deep scratches cause. So always should advance a workshop should be contacted to take a look at the windshield to assess the damage. If the scratch is too deep, it can also be repaired with a professional smart repair method not save much anymore. In that case, the disc should be expertly exchanged .
Replacing the disc is often essential!
In the event of deep scratches, the windshield must be replaced, as there are no alternatives. We know that now. But with light and medium scratches, it can be made viable again with Smart Repair. Quixx offers one Glass scratch remover with which you can carry out the repair yourself. But how well does it work? tuningblog tested it!
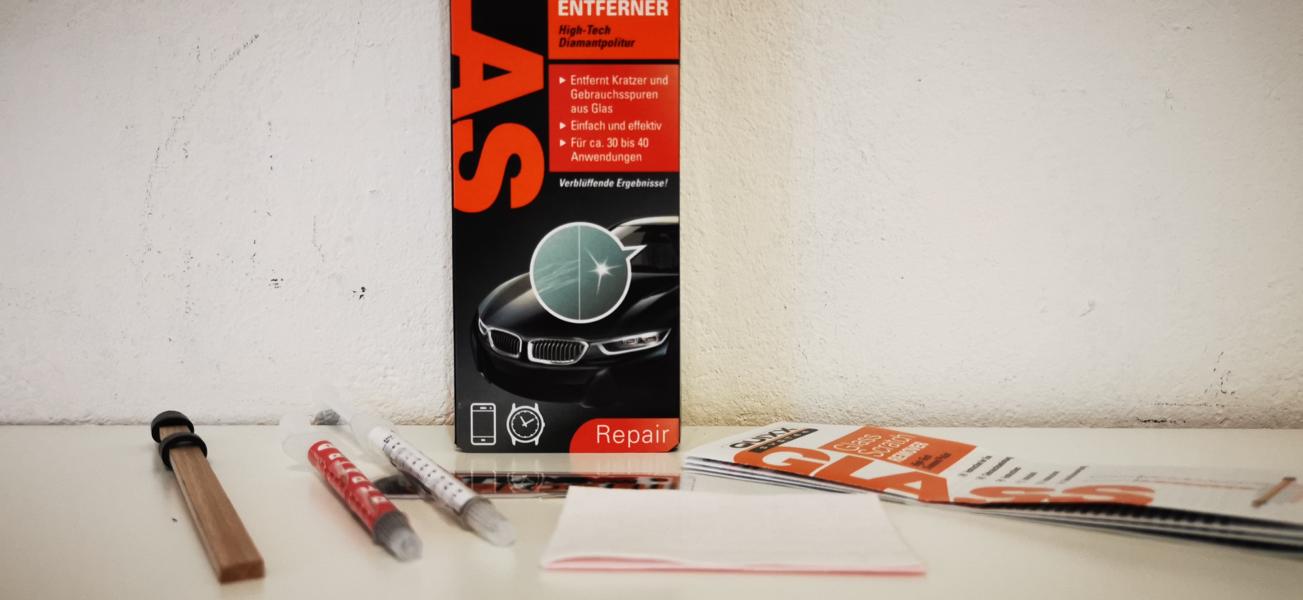
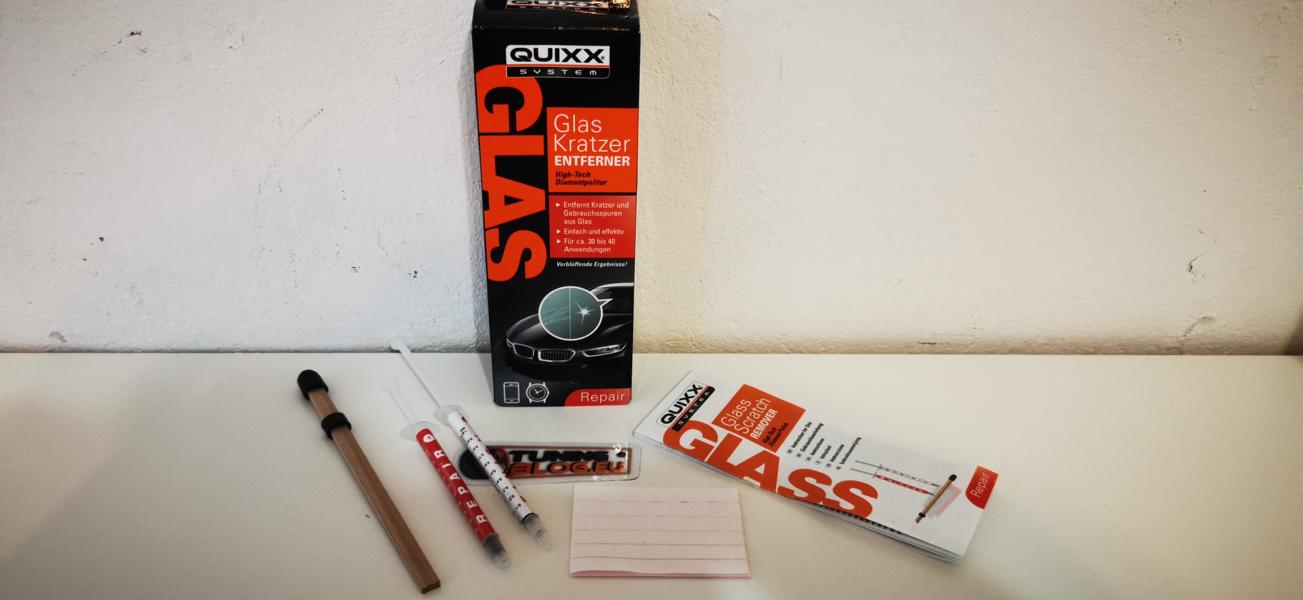
Quixx Glass Scratch Remover: This is included
For 19,95 euros (RRP) you can get the following items:
- A wooden polishing stick
- 5x red polishing strips
- 5x polishing strips in white
- "Repair" polishing paste in a syringe
- "Finish" polishing paste in a syringe
- Manual
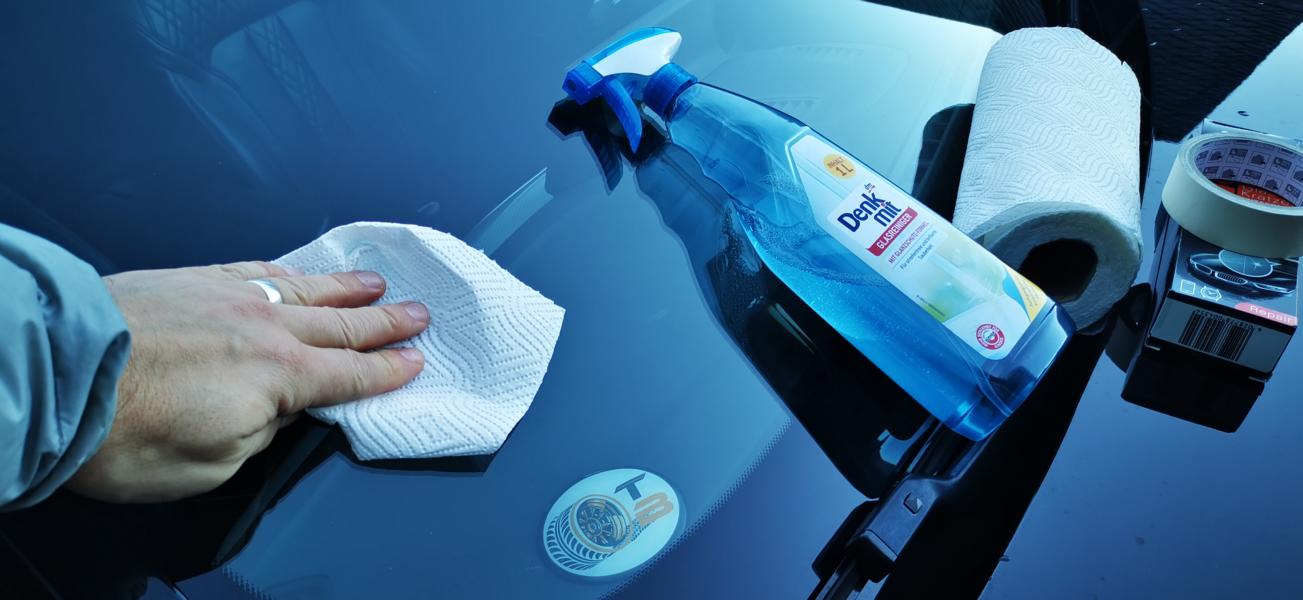
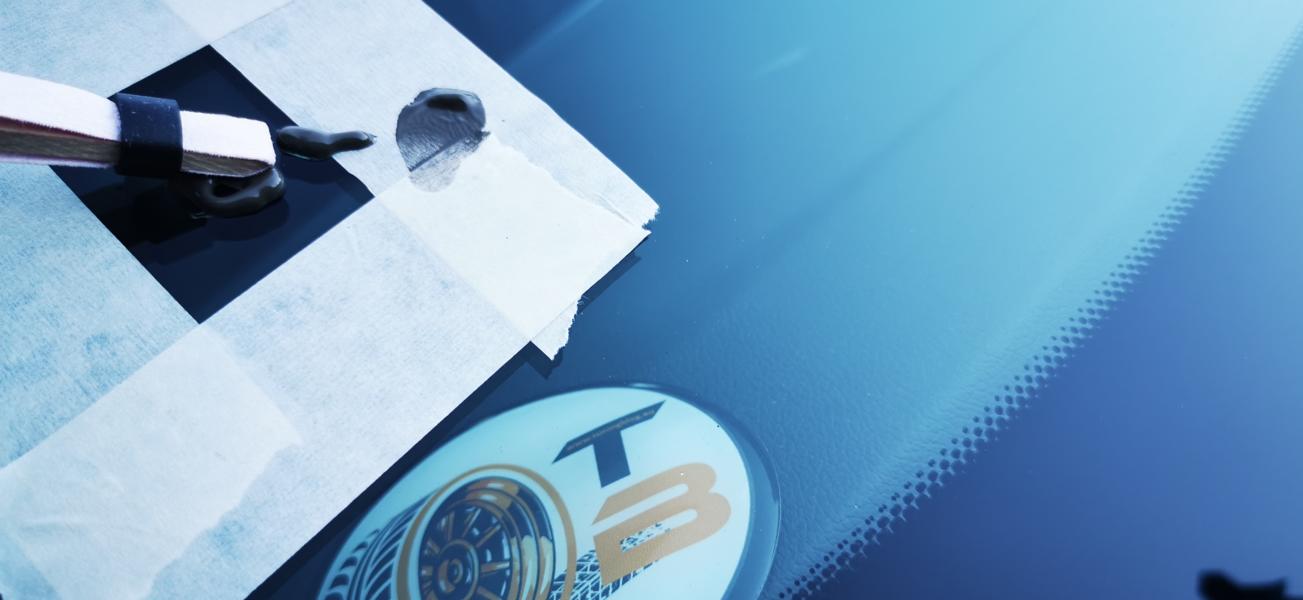
However, there are a few more things you should have ready before you start cleaning up the scratches. Before the repair, the disc must be covered with a good Window cleaner be thoroughly cleaned of dirt. And use the appropriate ones for this Tücher. Some Tape should also have them in stock so that the intact pane around the scratch can be masked off and protected from damage.
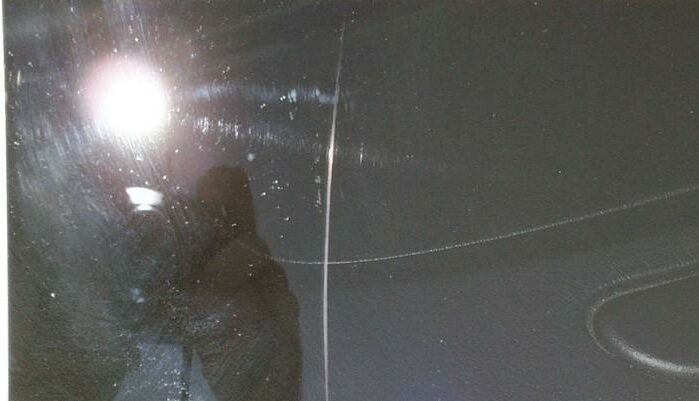
NOTICE: It can only light and medium Scratches can be removed with the glass scratch remover; if the scratches are deep, the pane must be replaced, as already mentioned. Our vehicle (unfortunately) had no classic scratches on the windshield, but a tiny one Stone Impactwhich, in terms of depth, corresponded to a scratch. It was hardly noticeable with the fingernail and that's why we tried this mini-damage.
Function of the Quixx glass scratch remover!
Une réponse en deux parties: The preparation
- For a good result is the right one Preparation important. The disc has to go first be thoroughly cleaned. If the glass is dirty, it can happen that the dirt particles cause even deeper scratches instead of removing them.
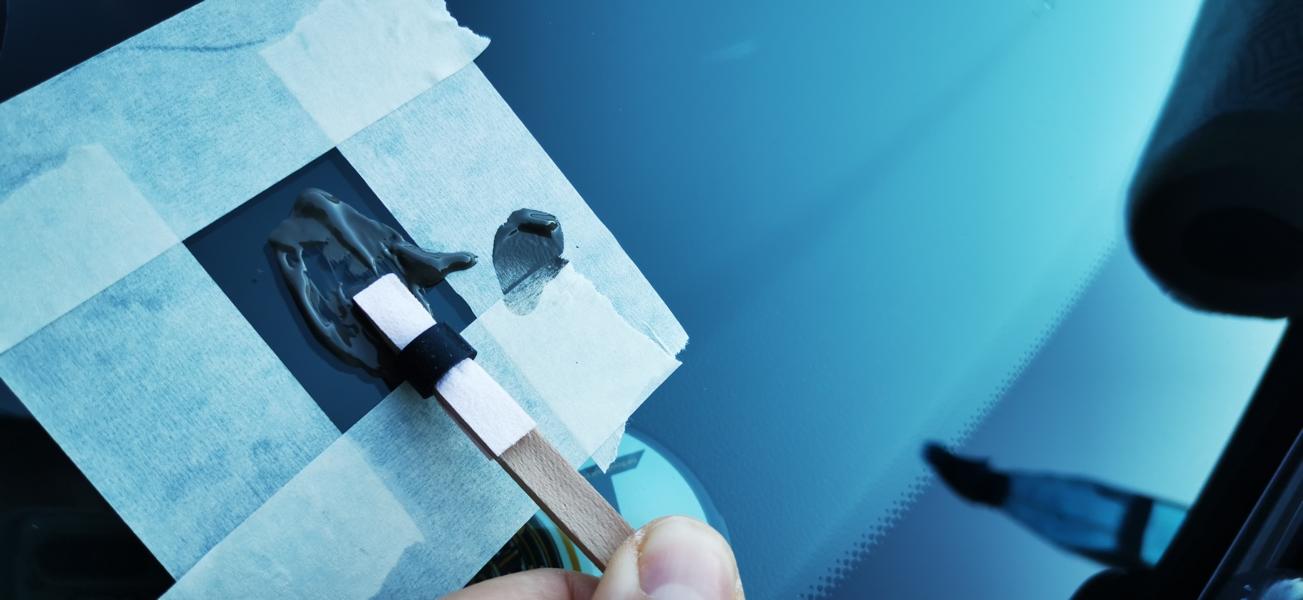
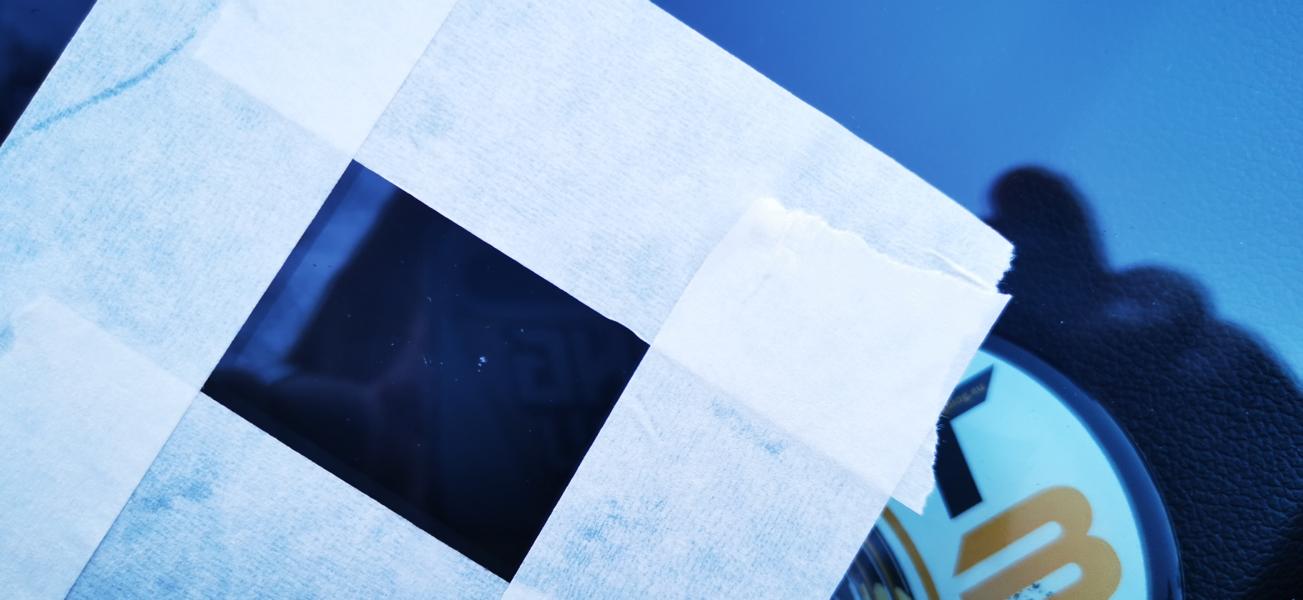
- After cleaning, place the pane at a distance of approx. 10 to 12 millimeters around the scratch mask off. The polish contains very strong abrasives that can quickly create new scratches if you are not careful.
- As soon as everything is prepared, they can Abrasive polishes be used.
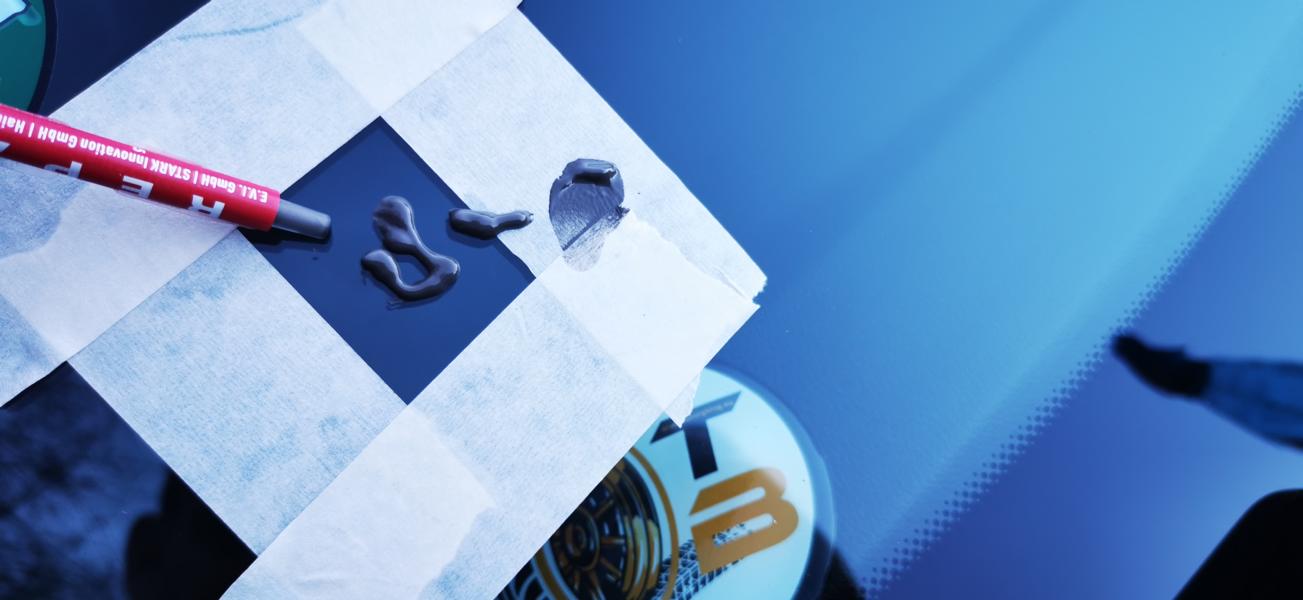
Une réponse en deux parties: Polish with the "Repair" paste
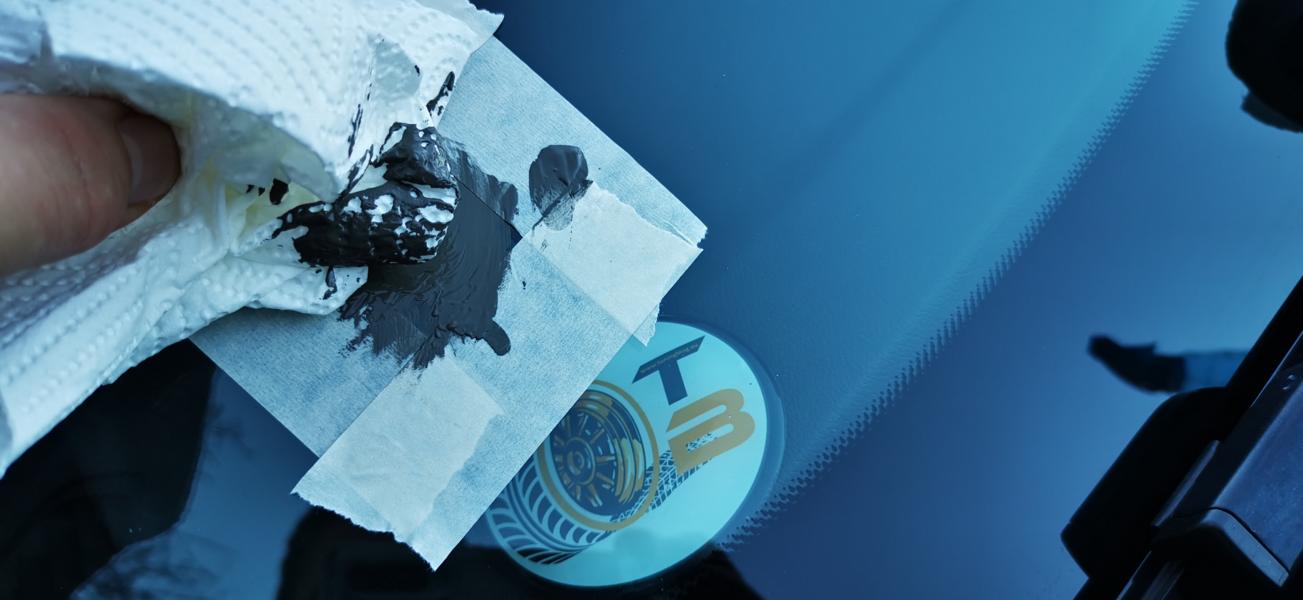
- The polishing with the "Repair" polishing paste is the most important step to the preparation. According to the instructions should be about 0,04 to 0,06 milliliters Apply polishing compound to the scratch, which corresponds to about two to three units on the syringe scale. Since the syringe is very easy to use, dosing is rather difficult. A higher dosage is not bad for the process, but unfortunately the 30 to 40 promised applications are not really realistic according to the manufacturer.
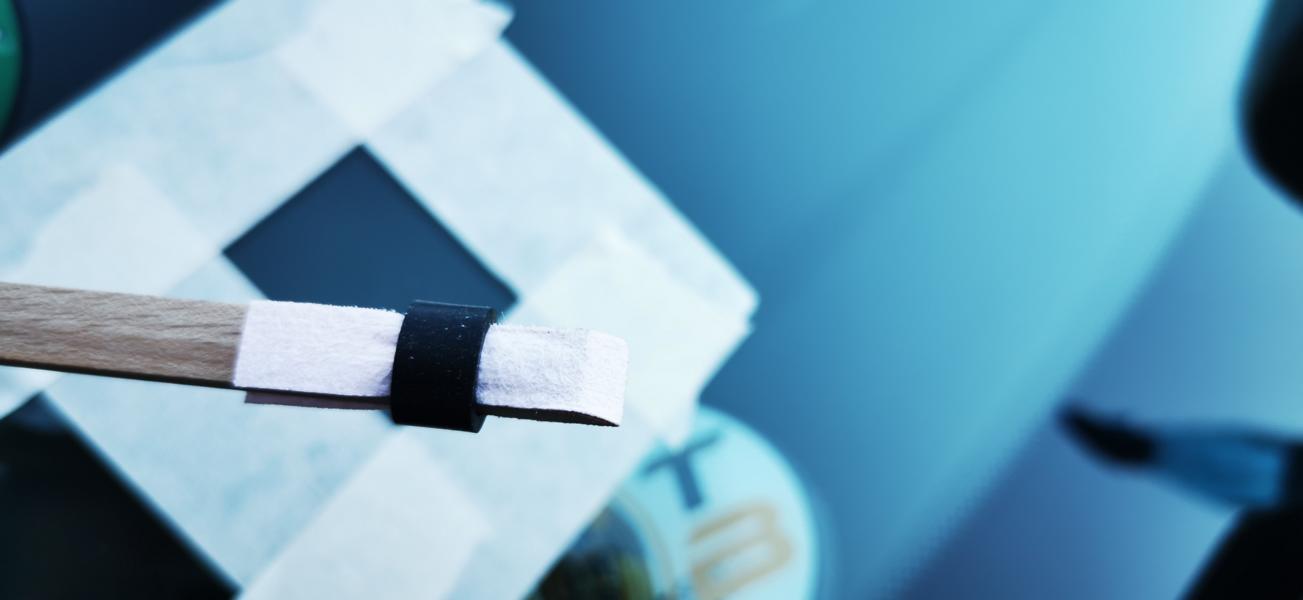
Une réponse en deux parties: The red polishing strip is used:
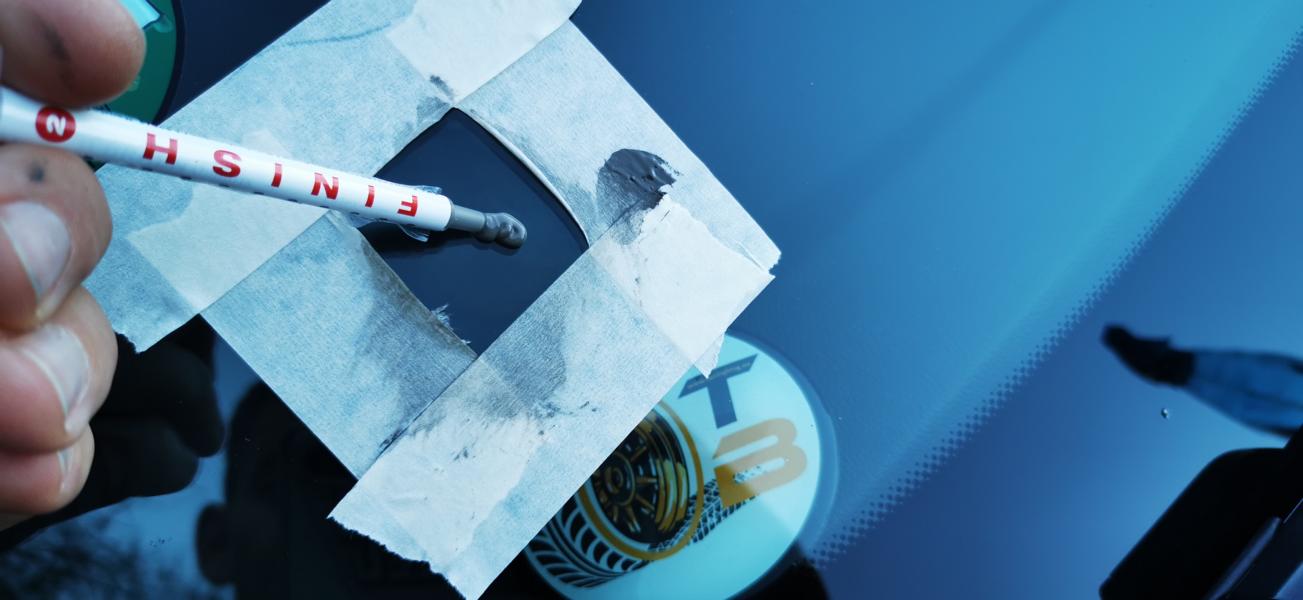
- For polishing you have to have a red one Polishing strips tear off and on the beveled end of the polishing stick. Now fix it with a rubber ring. Now the scratch with Pressure and brisk movements to edit. When polishing, make sure that the beveled side of the rod is in contact with the entire surface and in the 90-degree angle is polished. You should plan about 3 minutes for each polishing pass. How many passes are required depends on the depth of the scratch. One pass is sufficient for minor scratches; deeper scratches can be up to four or five Need passages. As already mentioned, Quixx points out that a satisfactory result can only be expected with light or medium scratches.
Une réponse en deux parties: Polish with the "Finish" paste
- Before using the “Finish” polishing paste, remove the remains of the “Repair” paste with a damp cloth be removed completely. Only then can you continue with the “finish” paste. Incidentally, there is also the dosage problem here, as with the "repair" paste. You have to go through the red polishing strip replace the white stripe on the stick. With brisk movements and high pressure you have to scratch the scratch again 15 minutes. polish for a long time. It doesn't matter what kind of scratch it is, but only one pass needed. Then wipe off all residues of the paste with a damp cloth.
Can scratches be removed from the window?
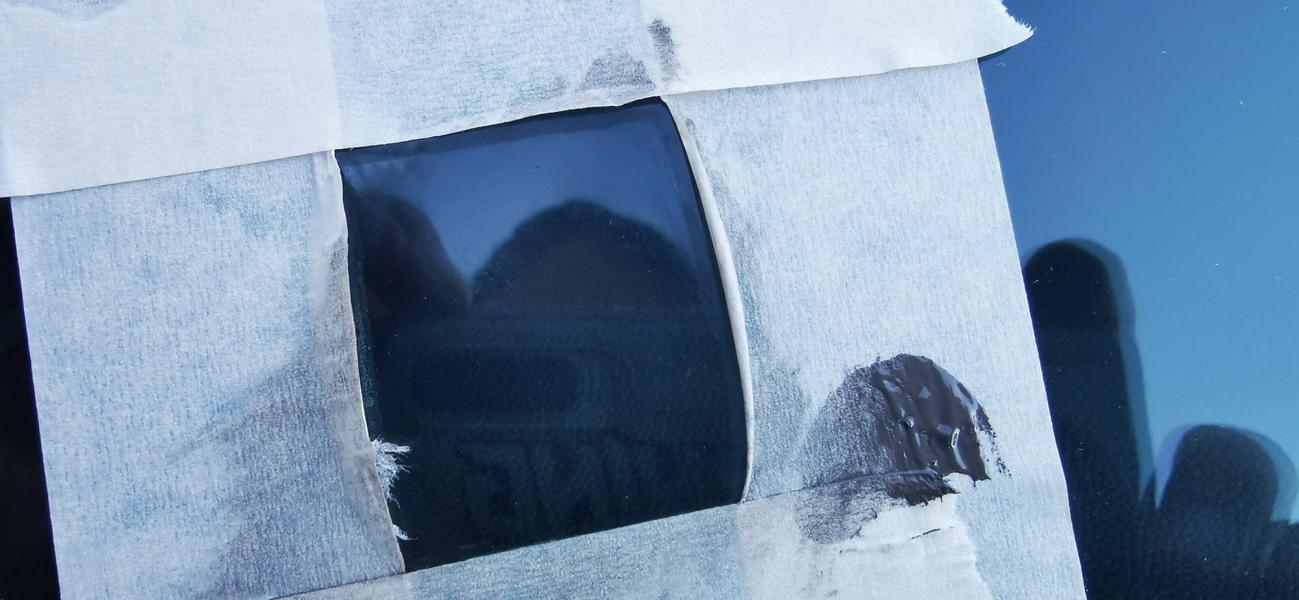
We come to the following conclusion: Light and medium scratches, in our case tiny punctual damage with the depth of a scratch, can actually be removed from the pane by using the Quixx glass scratch remover. It is easy to use and, if handled correctly, the result is impressive. The disadvantage is: The problem of dosing the polishing pastes in the syringes and the fact that the pane still has to be replaced if there are deep scratches. Nevertheless, the Quixx glass scratch remover for 19,95 euros is an inexpensive DIY smart repair alternative that offers a sufficient result and provides a clear perspective again.
Keywords: Scratch Remover, Glass Scratch Remover, Scratch Remover Set, Scratch Remover, Glass Scratch Remover, Glass Polishing, Glass Polishing, Glass Polishing Set
Of course, that wasn't the end of it!
tuningblog has countless other articles on the subject of car and auto tuning in stock. Do you want to see them all? Just click HERE and look around. In part, we would like to provide you with news but also off the tuning. In our category Tips, products, information & Co We have reviews of car or accessories manufacturers, new ones Tuning Wiki Terms or one or the other Leak veröffentlicht. Following an excerpt of the last articles:
|
BimmerLink: fault detection for BMW, Mini and the Supra!
|
BMW V-strut attachment for more optics? The installation!
|
Tip: Saphe Drive Mini or the Ooono Traffic speed camera detector?
|


"Tuningblog.eu" - we keep you up to date on the subject of car tuning and car styling with our tuning magazine and we present you the latest tuned vehicles from all over the world every day. It's best to subscribe to ours Feed and will automatically be informed as soon as there is something new about this post, and of course also to all other contributions.